One of the things I’m learning about Spoonflower is that blender patterns and coordinates sell well! You don’t have to make big bold hero patterns to do well there! This is surprising to me. I can’t imagine that there’s a lot of people out there paying for Spoonflower fabric just for basic patterns! But there are! So let’s make some plaid in Procreate!
As I mentioned in a past post, you can have fun with pattern-making even if you don’t sell on Spoonflower. So let’s make some plaid!

Disclaimer, Procreate is prepping an update that will likely change pattern-making steps and I will make a post once that happens but for now, here’s what I do!
Read part 1 here for the basics of making patterns in Procreate, then you will be ready for this!
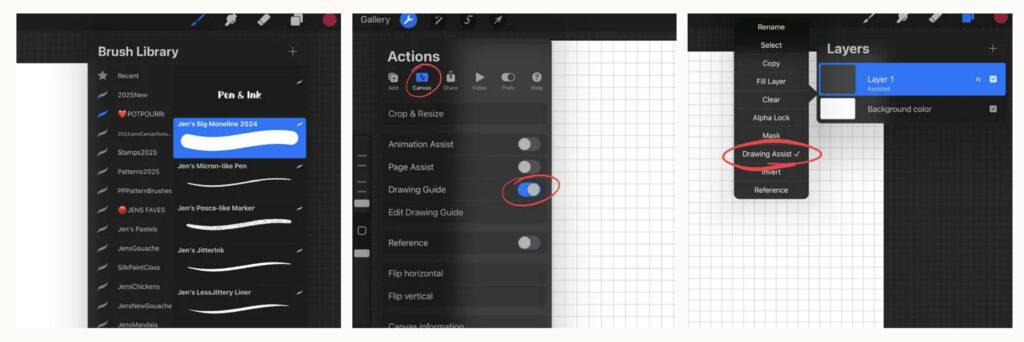
The biggest consideration is making sure your stripes lineup perfectly, the width AND the texture! So the top and the bottom need to match, and the left and right need to match. The easiest way to achieve this is to use a monoline brush that has no texture whatsoever and also doesn’t vary in width! Procreate allows you to “snap” lines perfectly straight but it isn’t always accurate for perfect vertical and horizontal. So I use the Drawing Assist on the 2D Grid! Easy-peasy! You can get my big monoline brush in my Potpourri brushset free as a newsletter subscriber here or edit the native brush to make it bigger. Then go into Actions, Canvas, turn on Drawing Guide, which will default to 2D grid. Turn on Drawing Assist on any layer and it will force you to draw perfect lines!
You will want to experiment with colors to figure out what works well together. The possibilities are endless! For now, feel free to follow along with similar colors to what I’m using here.
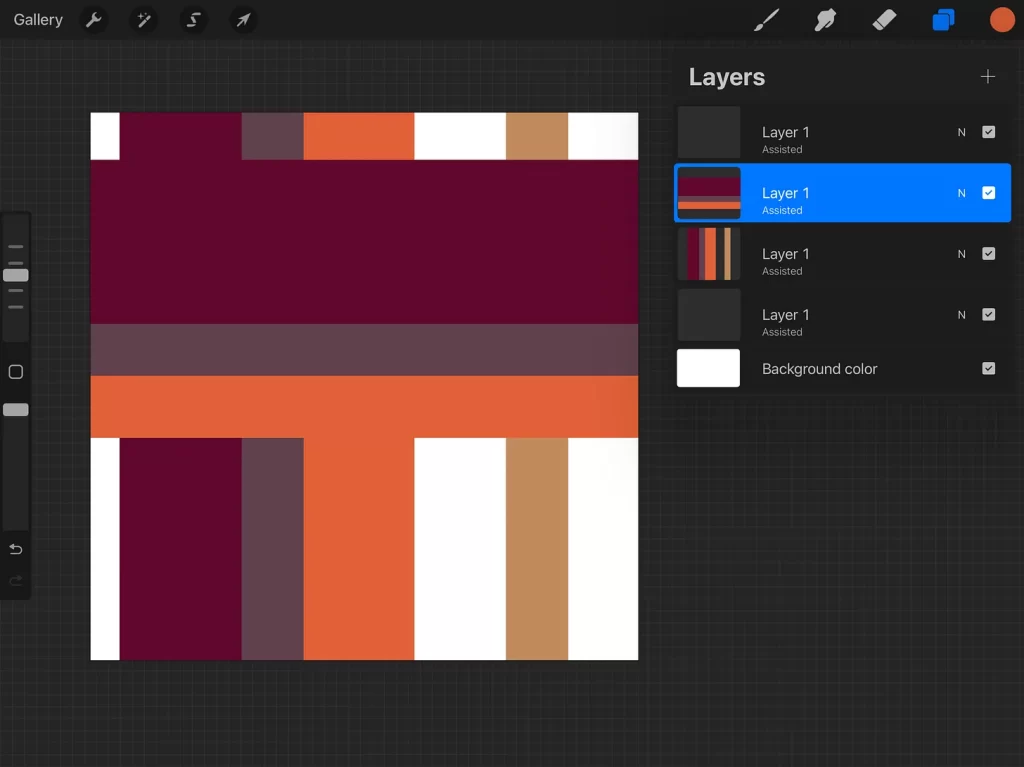
Making plaid in Procreate is easy. You can start with either horizontal or vertical lines and you can put all of your colors on the same layer or different layers. With your own experimenting, you will start to figure out your preference with this. You can see here I used one layer for all of the vertical lines.
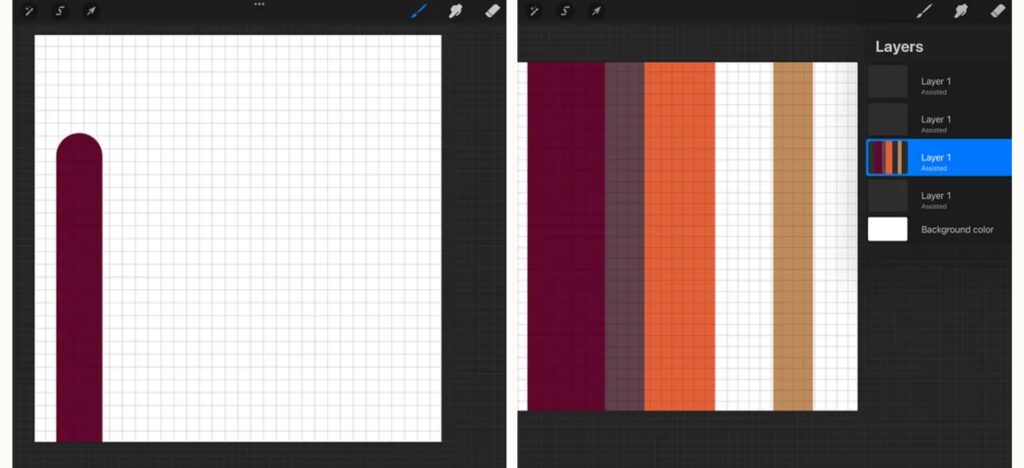
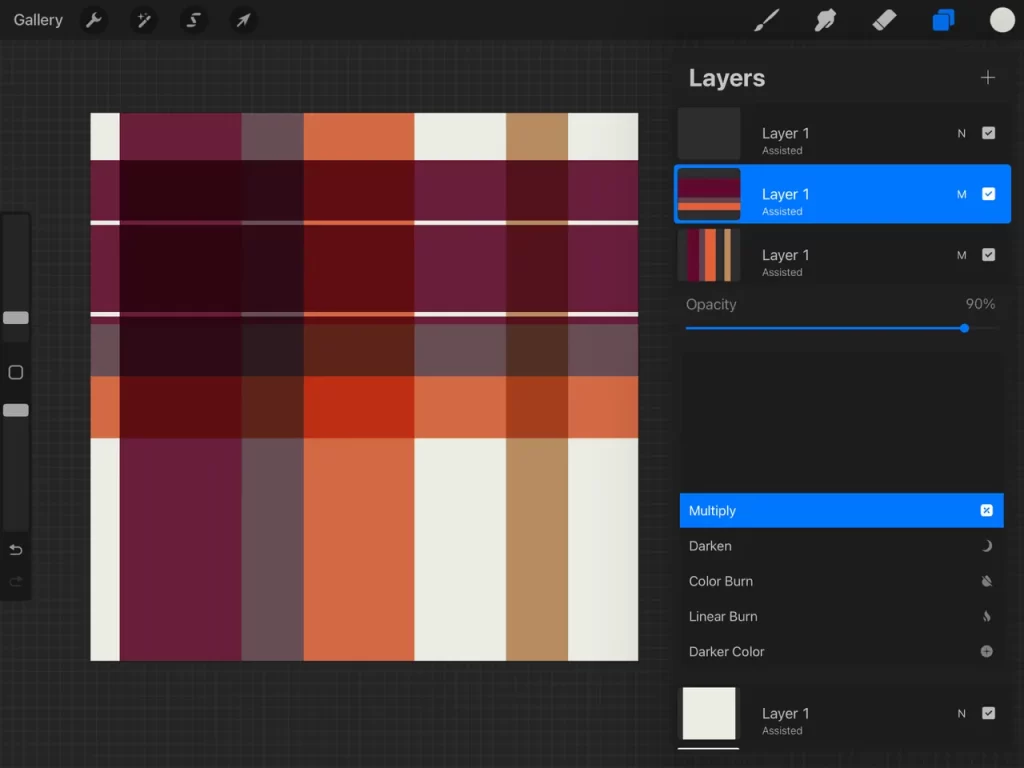
Now do the same thing in the other direction with a different layer (you can also turn drawing assist off so the grid lines go away, drawing assist will still be applied to your layers). I took this screenshot before I erased some finer lines on this layer which you will see in later images.
Since I have a light background color on this design, I am playing with how this looks using the Multiply Blend Mode which makes the overlapping areas amazing. I love this look. I also reduce the opacity of each layer which is what you will need to rely on if you have a dark background. The blend modes just won’t be too helpful in that case.
👆🏼THAT is your pattern! But you need to check it for seams (we talked about that in part 1) and of course, you will want to see a zoomed out version of it to really see the plaid! Now go ahead and 3-finger swipe down, copy all, then swipe down again to paste onto a new layer. Duplicate that layer so you have 4. Now shrink them into the corners! Check for seams to make sure your repeat is good!
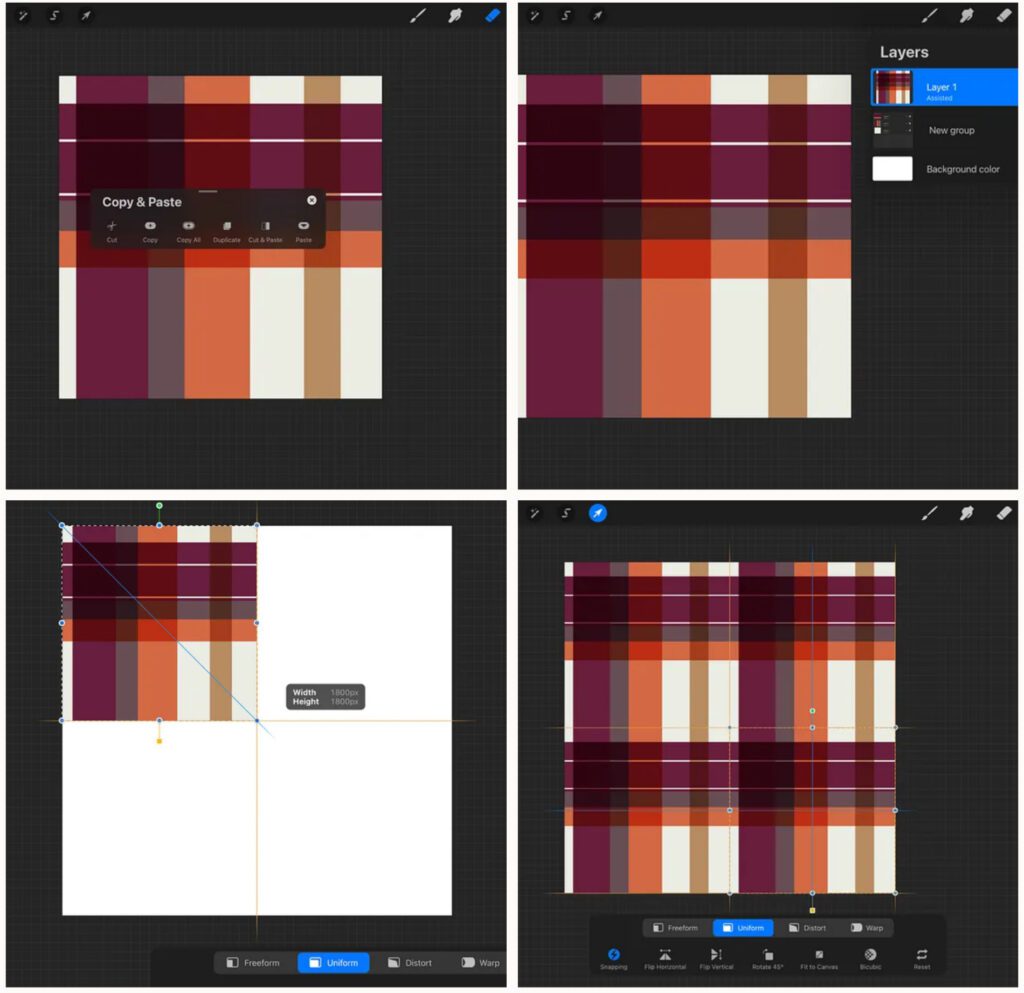
THE SEAMS LOOK GOOD! NOW GO CRAZY!! You can keep doing the Copy All…paste….shrink to the corners, over, and over, and over….
That’s the basics! You’re done! But if you want to make a pattern that looks like a traditional plaid, you can study the lines and figure out what the basic block is. Play and experiment!
Who’s ready for a few more tips?
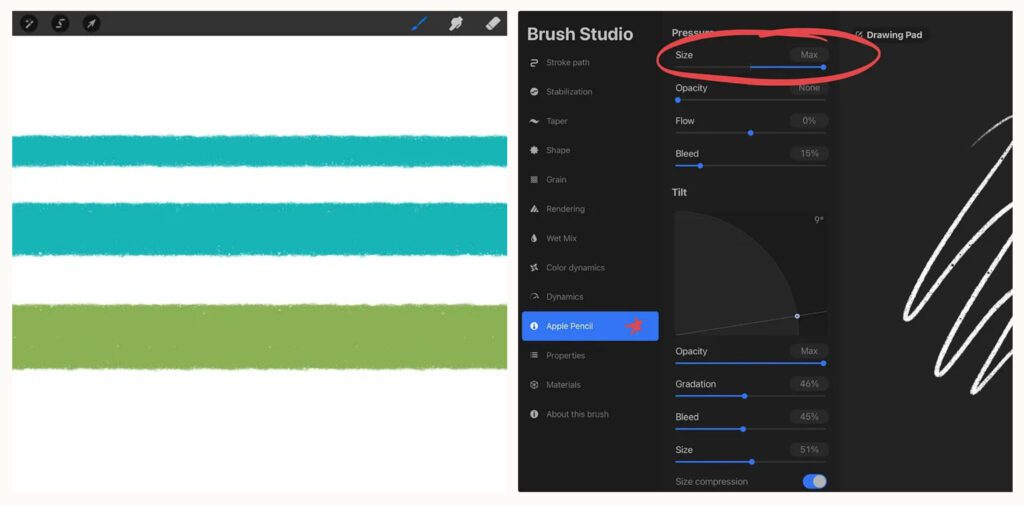
TIP 1: Experiment with texture brushes, just watch those seams really carefully! Watch the seams for textures within the lines as well as the textured edges of the lines. This is Dry Ink and if you go to Apple Pencil and change the size to 0%, it won’t get bigger when you add pressure, essentially making it a monoline dry ink.
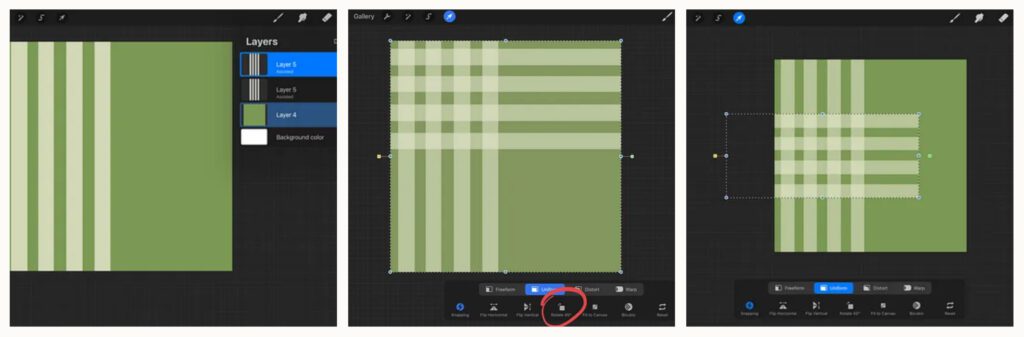
TIP 2: If you want your horizontal set of lines to be identical to your vertical ones, you can draw them once, duplicate them, and rotate one set. But when you rotate, select the layer you want to rotate AND a filled layer at the same time (swipe right on the layers you want). That way, the rotation point is in the middle of the canvas. That’s what is shown in the first two images below. If you try to simply rotate the lined layer alone, it will rotate improperly, like what you see in the third image.
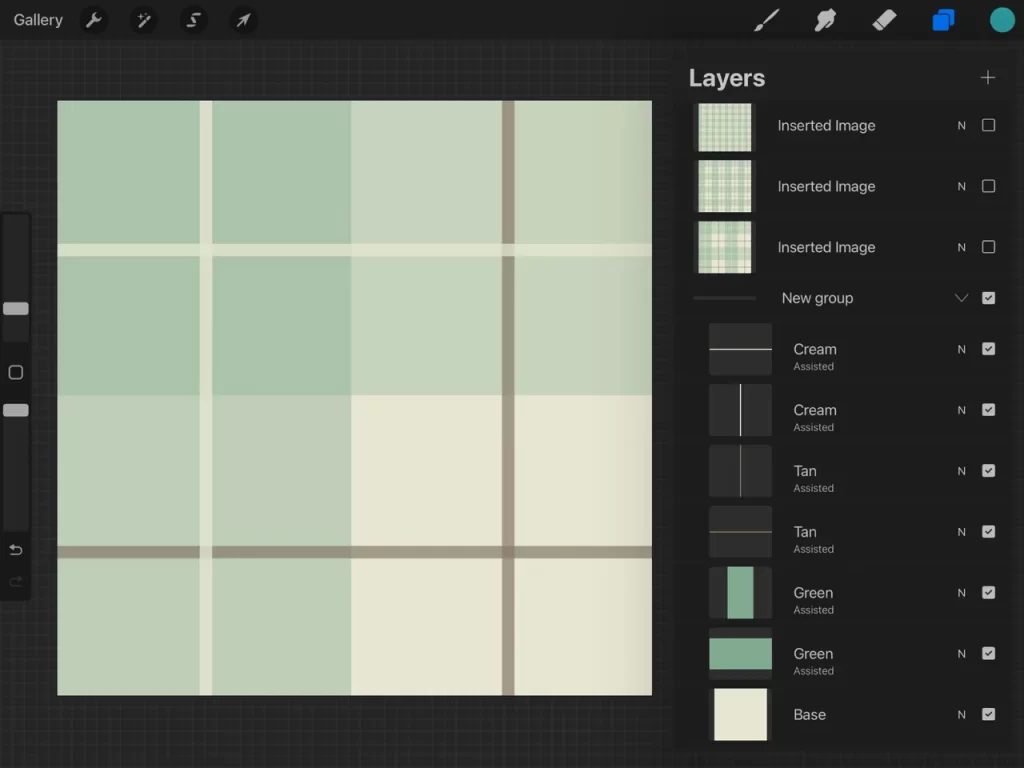
TIP 3: If you separate all of your lines onto different layers, you will have more flexibility with the looks you can achieve. I also like to keep the same colors together in the layers. See here I have the thin cream colored lines in both directions, then both tans, then the wide greens.
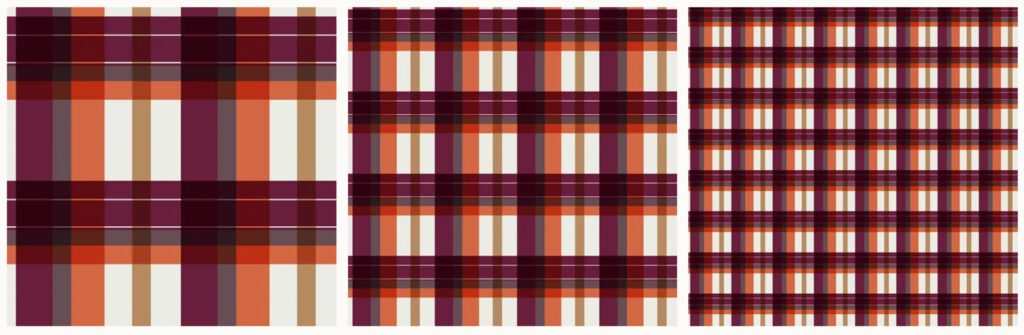
Keeping lines separate also means you can make this plaid pattern once in Procreate, duplicate it, and make other color variations. You can also play with the opacity of each layer individually. The patterns below are all from the above pattern. This gets a bit complicated when you have lots of lines but you can do it!
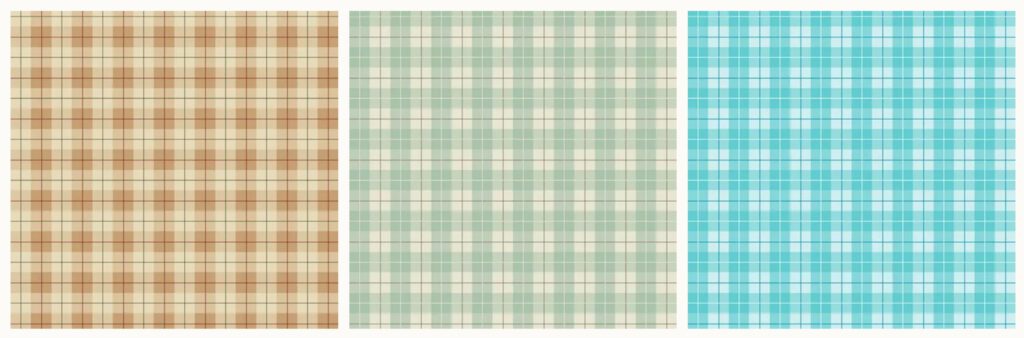
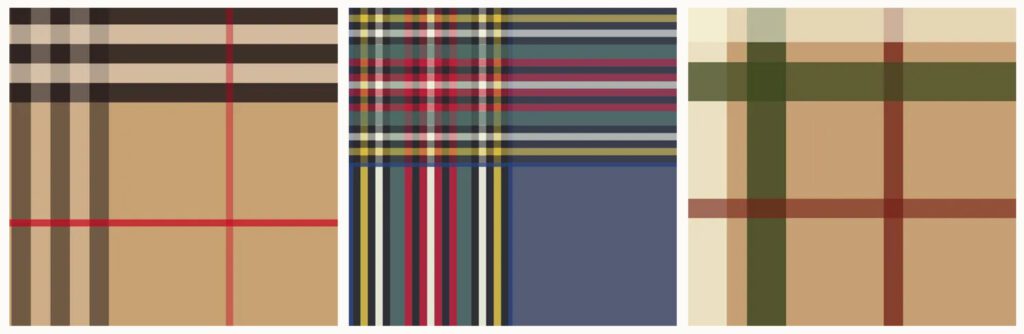
I hope this gives you some inspiration to make your own! Here are some screenshots of some classic plaids I have attempted so you can see how MY eyes see the basic building blocks! On the first one, I used lower opacity on the vertical lines than I did on the horizontal lines too. Experiment and have fun! -Jen
P.S. What to learn about diagonal plaid patterns in Procreate? Here’s my YouTube lesson on it! I have countless other repeat pattern lessons in my membership if you’re interested!