Scales and scallops, I see both names and never know what to call them but they’re sure fun! Be sure to review part 1 in this series to get the basics before reading this post so it makes sense! If you haven’t been practicing and gaining that muscle memory, you might forget the reasons for corner marks and the like but part 1 reviews all of that.
There are so many things you can do with this shape and it’s easy to do in Procreate! Ready?
Let’s make a “scales and scallops” template first.
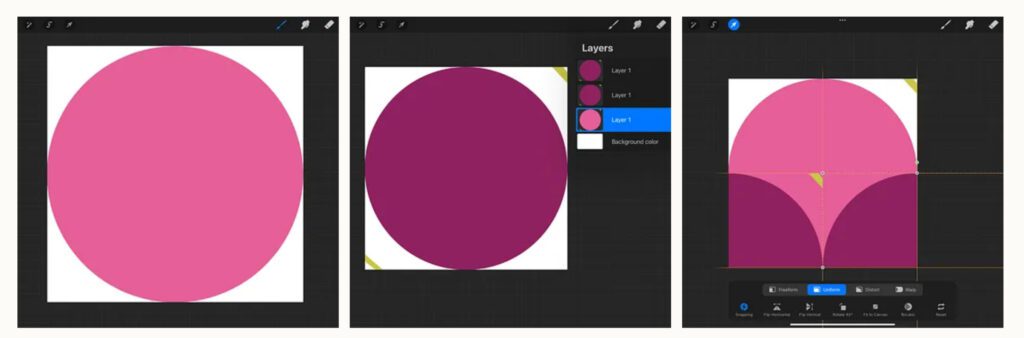
I use a monoline brush to make a perfect circle with clean edges. Draw your rough circle and hold the pencil in place once you get the circle closed, you will see it “snap” to a smooth circle or ellipse. Keep the pencil in place and with your other hand, put one finger on the screen so it snaps to a perfect circle! Now you can lift your finger and pencil! Now select it with the arrow at the top left and choose “fit to screen” in the lower menu.
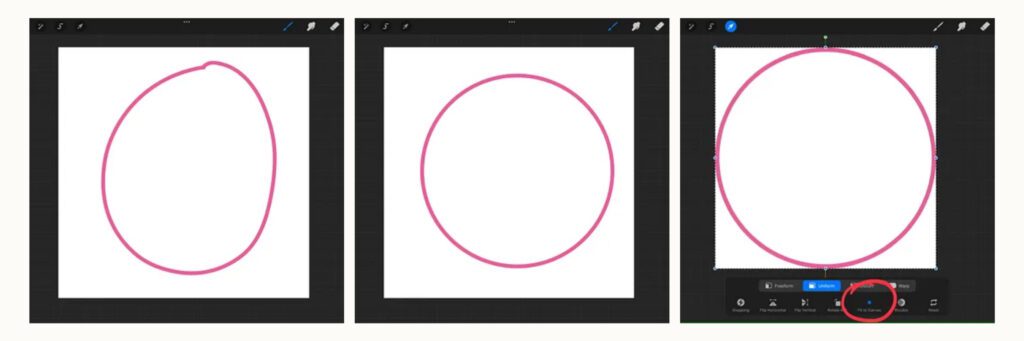
You just made a perfect circle that technically should be going all the way to the edges of the canvas but I don’t quite trust that it does, so I add corner marks to it! You need to drag and drop any color to it to fill it, then duplicate it so you have a total of three. Colors do not matter here. Select the circle on the top layer, make sure Snapping is on, and drag it to a bottom corner, you should see the gold lines. Do the same with the other circle on the second layer and drag to the other lower corner. Now erase all corner marks on all three layers!
Almost done with the template!
Merge the two lower quarter circles onto one layer and from the layer menu, tap Select. Now go to the full circle layer and tap Clear from the layer menu. You can delete the layer with the two quarter circles on it and you are done making your template!
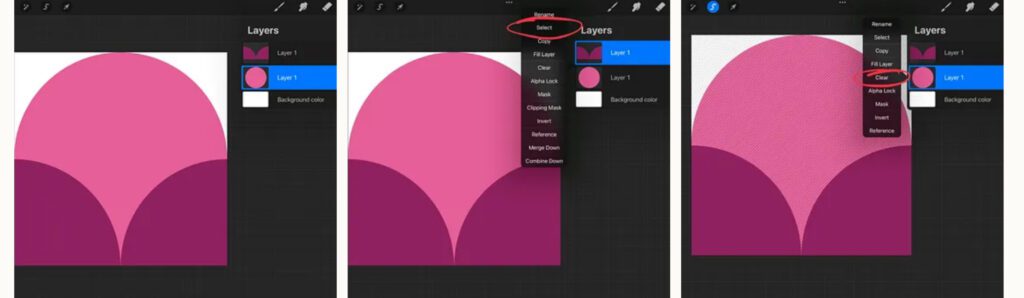
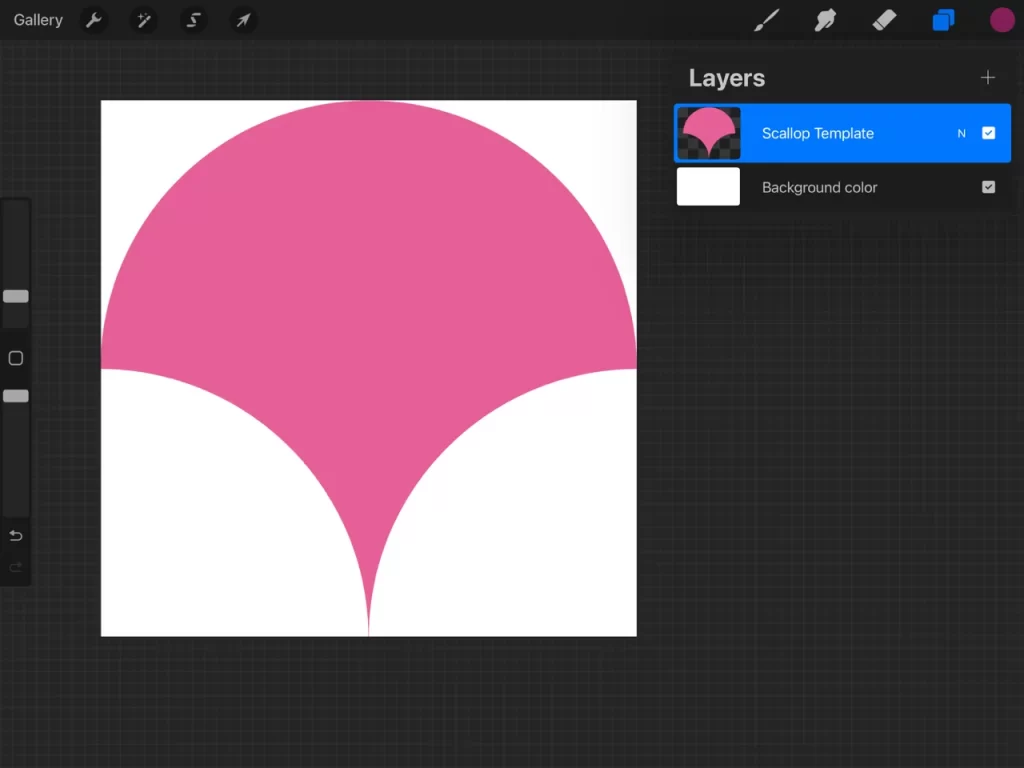
Tada! I like to Alpha Lock the template layer so I remember not to draw on it. Now you can reduce the opacity of it so you can barely see it in the background. You are ready to design some scallops on some layers above this. Do anything you want within that scallop shape. Try to “stay in the lines” but experiment with going out of the lines later, once you understand the steps!
Time to design one!
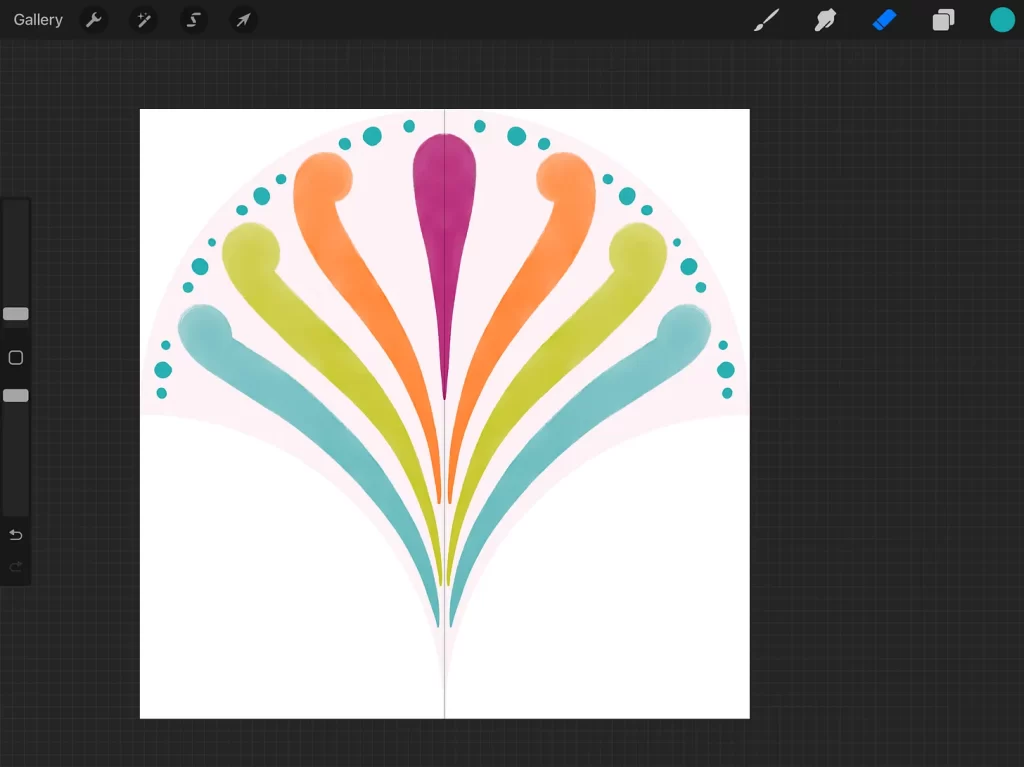
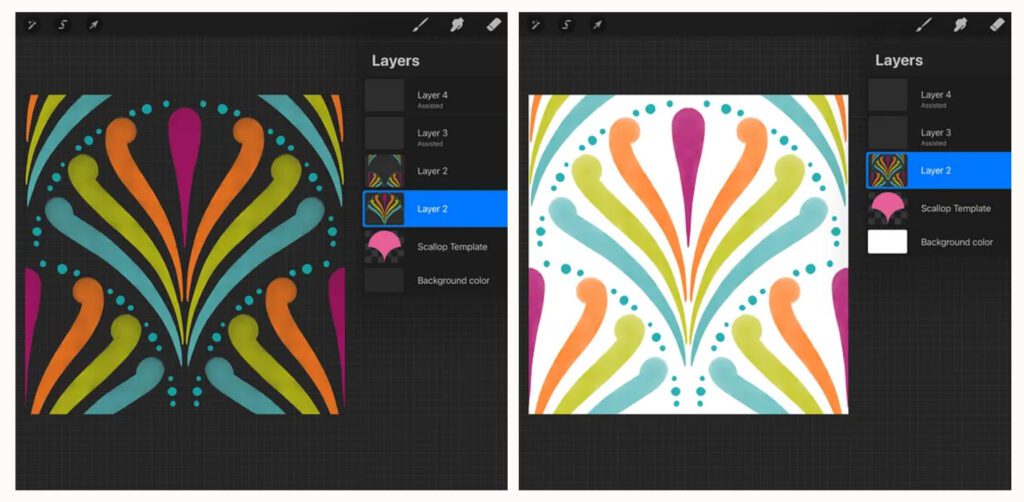
You can use vertical symmetry if you want both sides to look the same like this (but it’s also fun to avoid symmetry)! Turn on Drawing Assist and go to Symmetry, it defaults to vertical. You can see here how I have kept the faded template in the background so I know where I can draw.
Once you finish a scallop design, be sure to turn off the template layer and the background, and add your corner marks.
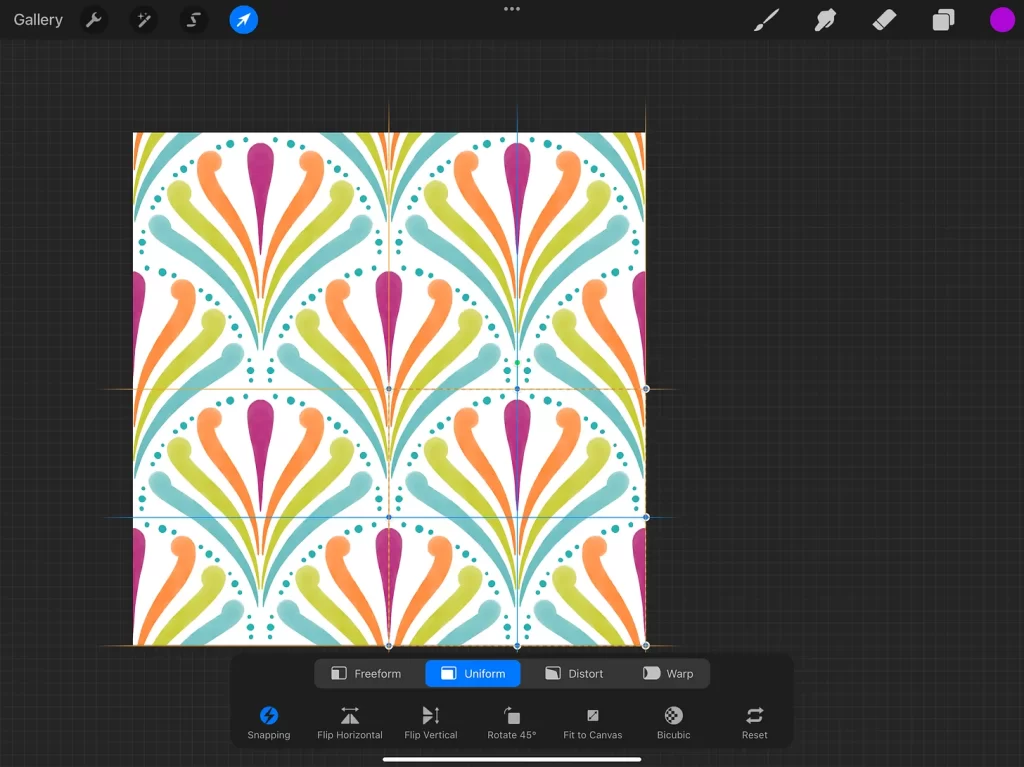
For this repeat pattern, you “copy all and paste” and make 5 total layers. You push four of them into the four corners with Snapping on, making sure you get your gold lines, and you keep one in its original position!
Erase the corner marks on all layers and merge them! You can turn the background layer on as well.
(I have loads of recorded pattern lessons so if you learn easier by watching rather than reading, definitely look into my classes!)
Time to check your pattern for gaps and offsets (this is all explained in part 1 of this series). Duplicate this layer until you have five (turn one off, just in case you need it later…it’s also the 1×1 version of your design). Shrink four of the layers and put them in the four corners like this 👇🏼. Zoom in and check the seams along the centers of the canvas. If it looks good, merge those four layers and you have a 2×2 of your pattern. This is also a good time to decide if you like it! If there are changes you want to make, you can go back to the original scallop and edit it, then go through these same steps again.
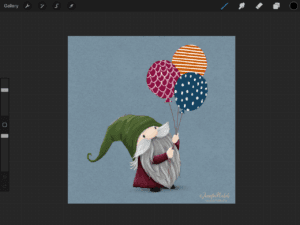
Remember, you can play with different background colors too!
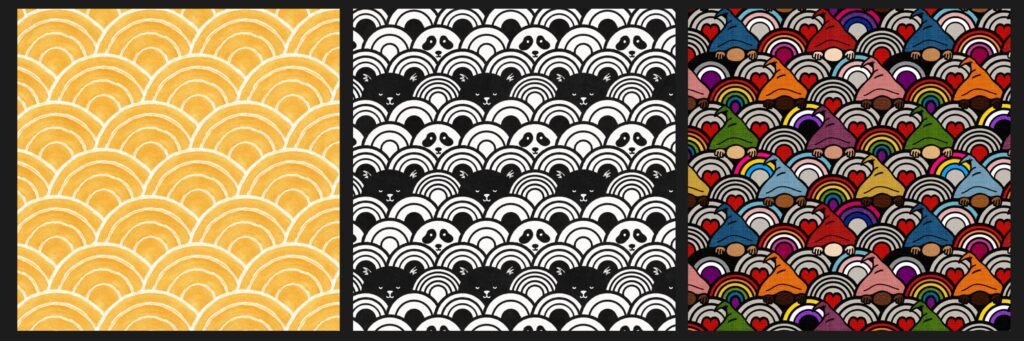
That’s the very basics of scallops, they can be facing up, down, or sideways! Keep reading if you want a few more tips!!
More things to think about.
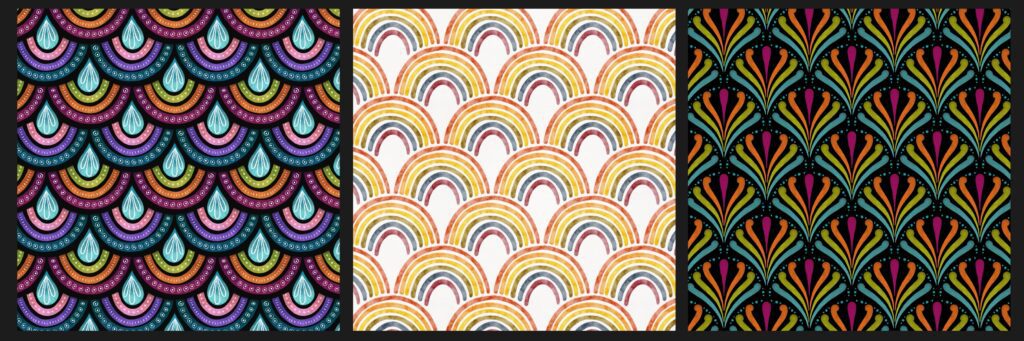
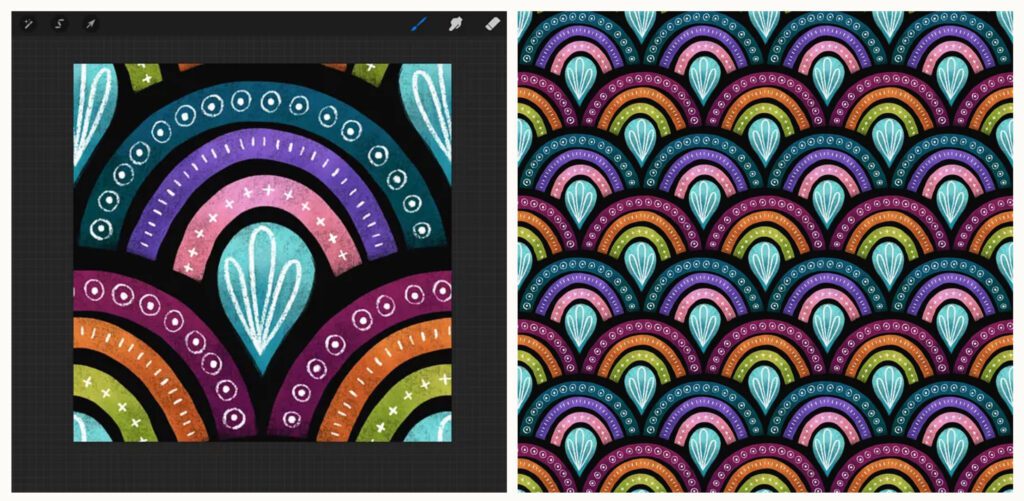
Two Designs In One: You can make one scallop design that gets duplicated and pushed to the four corners, and a second design that stays in the middle. You can see below that I’ve simply done this by changing some colors on the center one. When you look at a zoomed out version of this, notice how it actually makes rows of the same color version. So it’s alternating rows of the magenta/orange/green rainbows and the teal/purple/pink rainbows.
By the way, I’ve been using brushes from my free brushset called Procreate Potpourri which you can get any time. It’s a “newsletter freebie” which you can sign up for here. You will get the link and password in the welcome email. Enjoy!
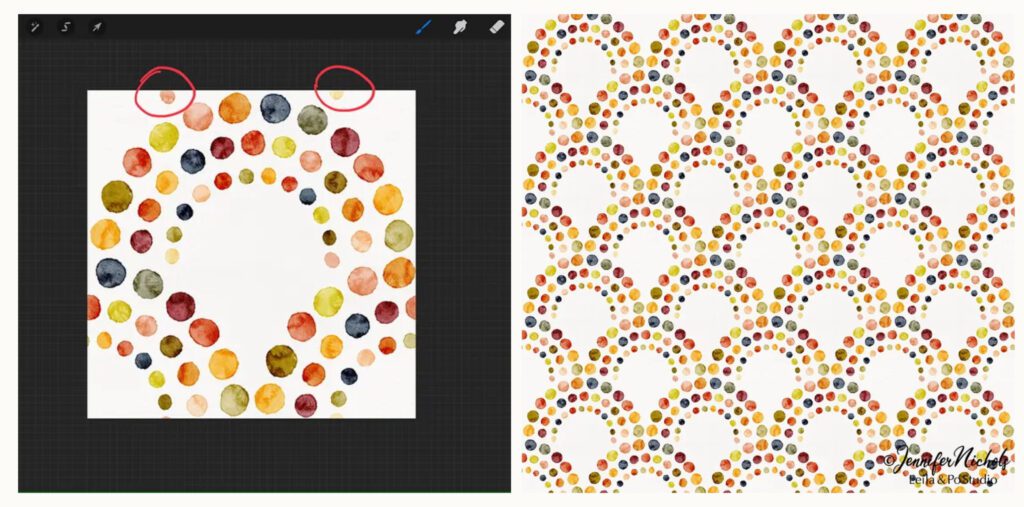
Always make sure you push duplicates to all four corners: Sometimes it won’t look like it’s needed but there can be very small parts of the design that will get missed if you don’t do all four corners.
Let’s talk about “painty” looking lines and “going off the edge”: For this simple scallop, I used a painty brush and made sure I did not go over the edges of the canvas. Remember, things (currently) crop when they go off the edge. I got REALLY close though. You can see what this looks like in the second image.
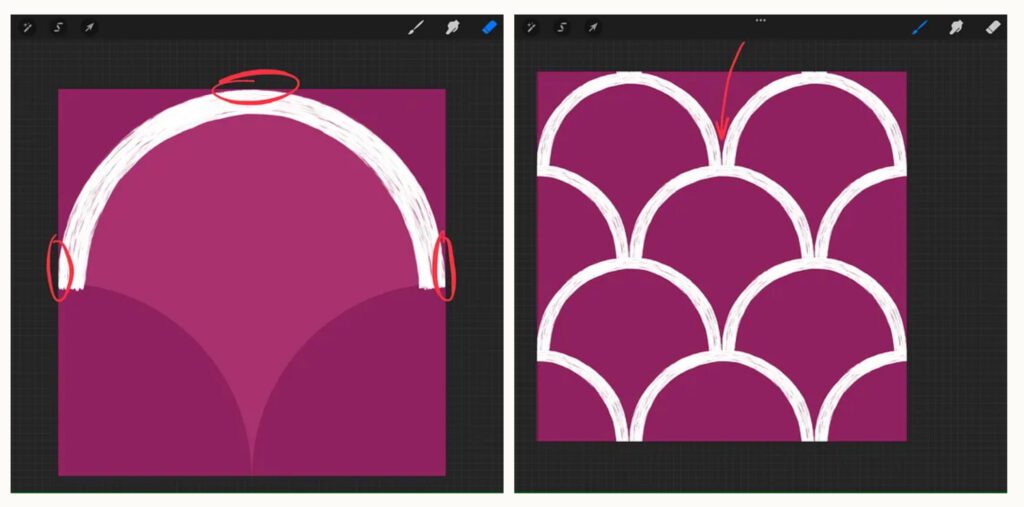
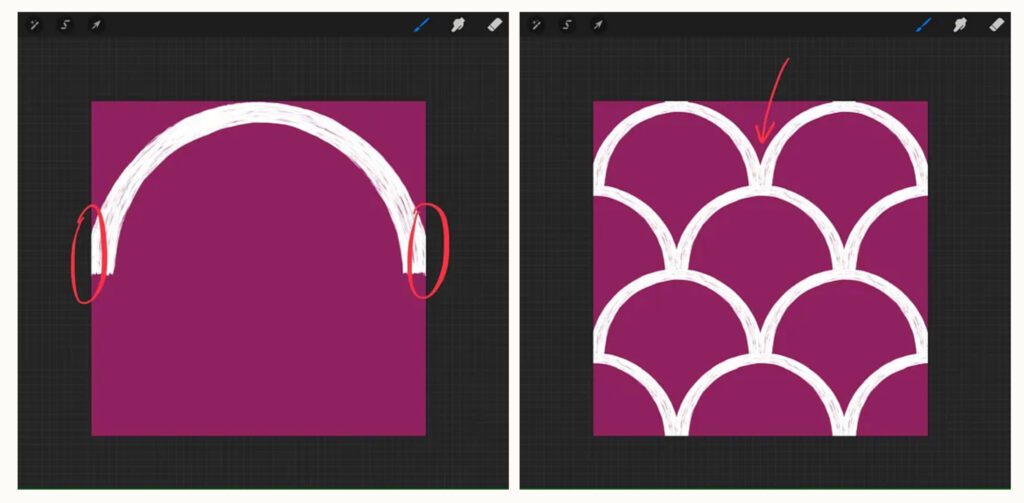
You can turn on vertical symmetry to paint the left or right sides if you want to go off the edge though! This will ensure that your pattern lines up when it repeats.
And you can also make your line so it’s nowhere near the sides of the canvas! Here’s what that looks like:
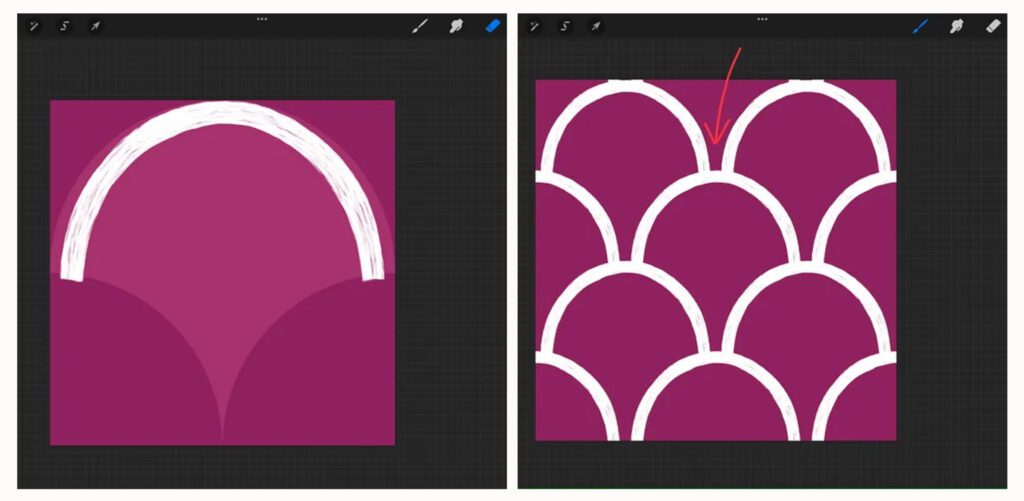
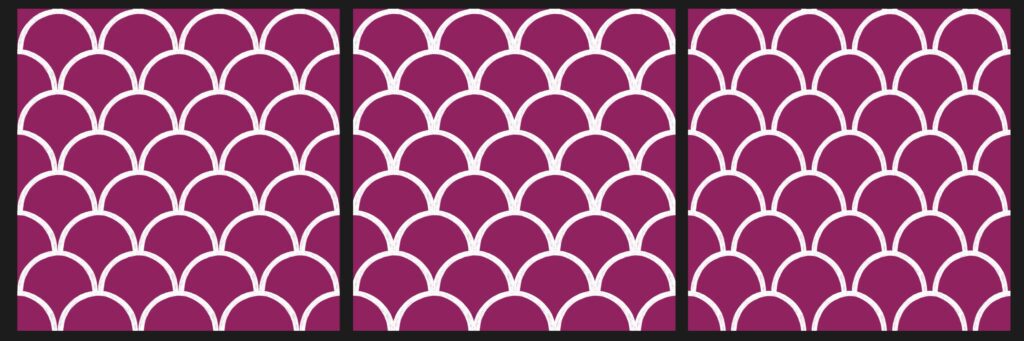
Here they are all next to each other. The differences are subtle but depending on your design, it may be an important factor!
Finally, I also figured out a way to make overlapping scallops and it’s going to level up your scallop designs! Do you see how the base of the arches are overlapping in the examples below? It’s a bit complicated and I explain basic and overlapping scallops in this YouTube video!
Enjoy!
Jen