Hopefully you know by now that I love to do as many things as possible in Procreate! And collage art is no different! This isn’t a new technique but it’s the first time I have blogged about it. I love the looks you can achieve with just a few steps. So if you are interested in learning, stick around!

Here are the steps in a nutshell:
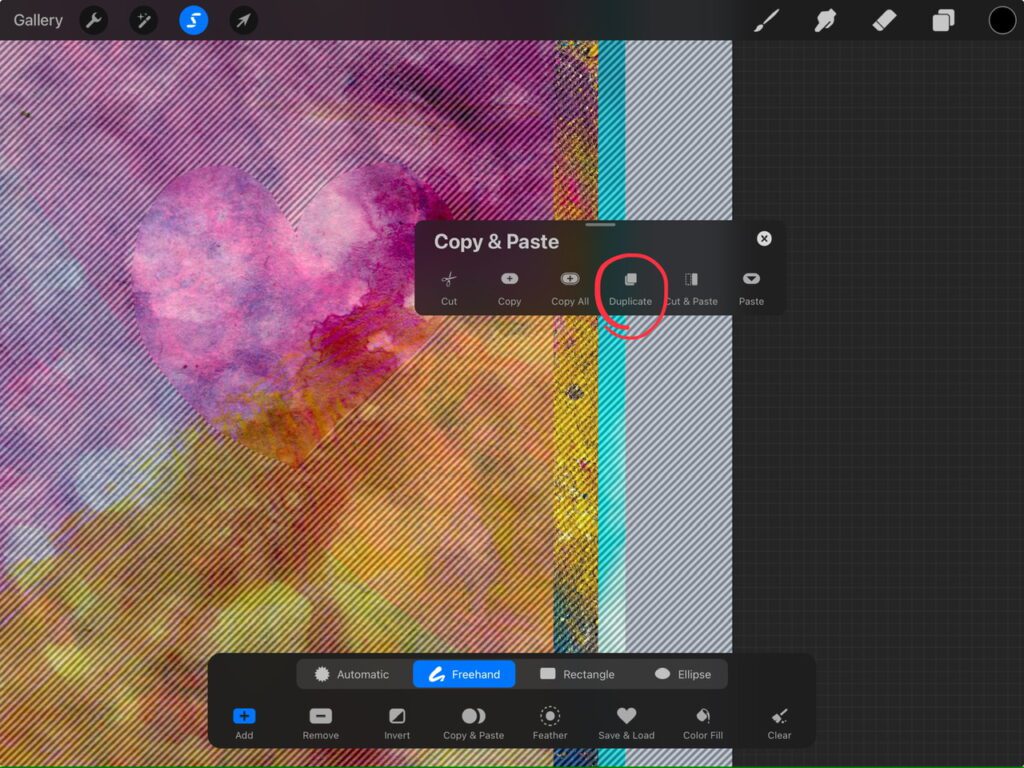
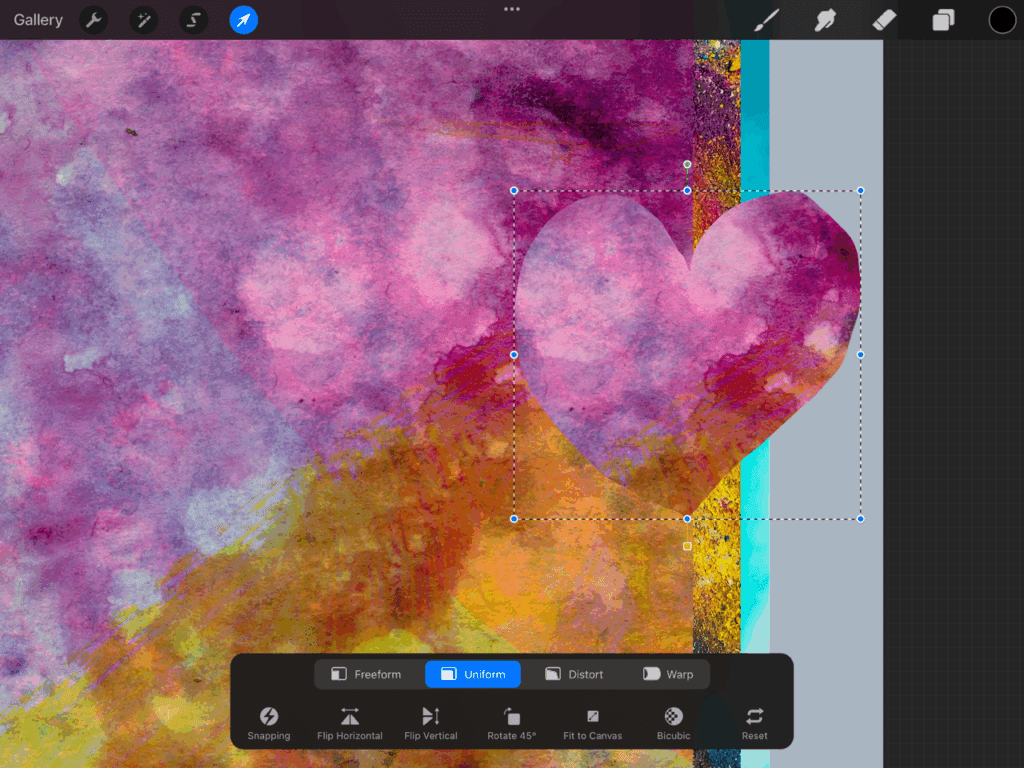
Find or make “paper”. Use freehand selection to make a shape you want to cut out. Three-finger swipe down and choose Duplicate so you have the shape on its own layer. Rough up the edges if you want a torn paper look. Make a shadow underneath. That’s it!
Finding Your “Paper”
There are plenty of free-use website to find images, I use Unsplash.com and you can play around with different searches to find images that you prefer. You can download them and save them to your camera roll (and make an album if you choose). Here are some direct links to a couple great images. Once you click on one, you can scroll down to see similar images as well…it’s a bit of a rabbit hole so be aware. 😉 Oh, you can also make your own “paper”!
https://unsplash.com/photos/orange-pink-and-yellow-textile-5syls8GxO1Q
https://unsplash.com/photos/blue-white-and-brown-floral-textile-Bin0C2RtQpI
https://unsplash.com/photos/a-red-blue-and-green-pattern-on-a-beige-background-kMjAp4sfdkQ
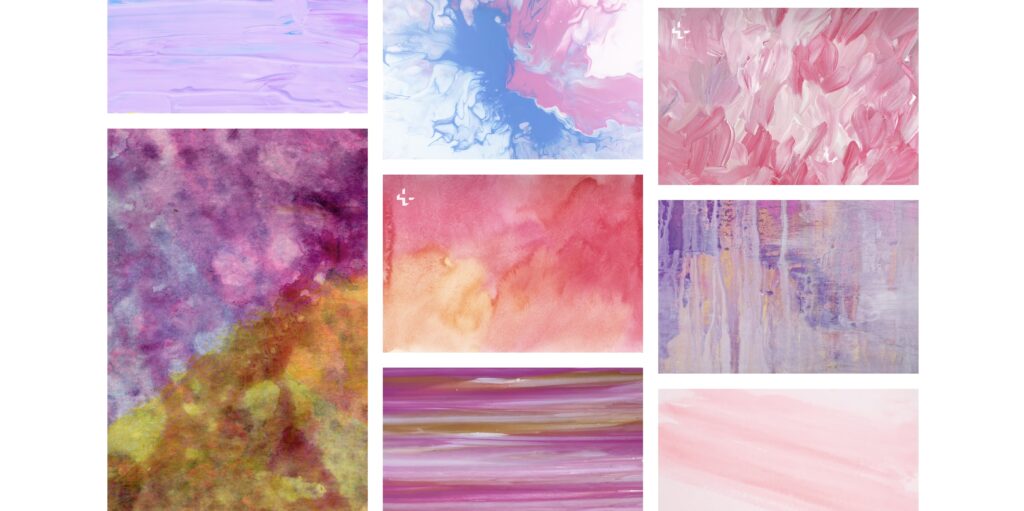
OK, are you back from the Unsplash Rabbit Hole? Do you have the images saved? Go ahead and import a few into Procreate! Pro Tip: You can play with the colors by using Hue/Saturation/Brightness! You can also make “plain” paper in any color or texture you’d like by using canvas texture brushes like I show you here. That’s how I made the plain purple paper below!

Time to Cut!
Select the layer of paper you want to cut from and I just use the little “ribbon” on Freehand to draw a shape. This gives a lovely, imprecise, handmade look. If you do the handy three-finger swipe down, you get the menu that allows you to Duplicate so it doesn’t actually cut it out of the paper, which means you can use it again! If you want the paper to have the cut-out, just choose Cut & Paste instead! That’s it! Tips: You can cut to your heart’s desire! You will want to rearrange layers so the cutouts are above the big paper layers. If you can’t see the selection mask (or maybe you see it too much!) you can adjust it by going to the Wrench icon (Actions menu) while a selection is highlighted, then go to Prefs and down to Selection Mask Visibility.
Time to Rough Things Up
Before making the shadow layer, make sure you know the final shape of your cutouts first. Maybe you want to clean up some bits and bobs from the cut-paper pieces? If you want a torn paper, I like to use the Dry Ink brush to erase the edges in a rough-looking manner in order to make the edge look torn. You can also add some color around the edges using that same brush for an even better ripped look (I use either Alpha Lock or Clipping Masks for this). Experiment with different brushes, for the erasing as well as the adding! Remember, NOBODY is going to zoom way in to see if it looks exactly like paper. 😉

Simple Shadows Change EVERYTHING
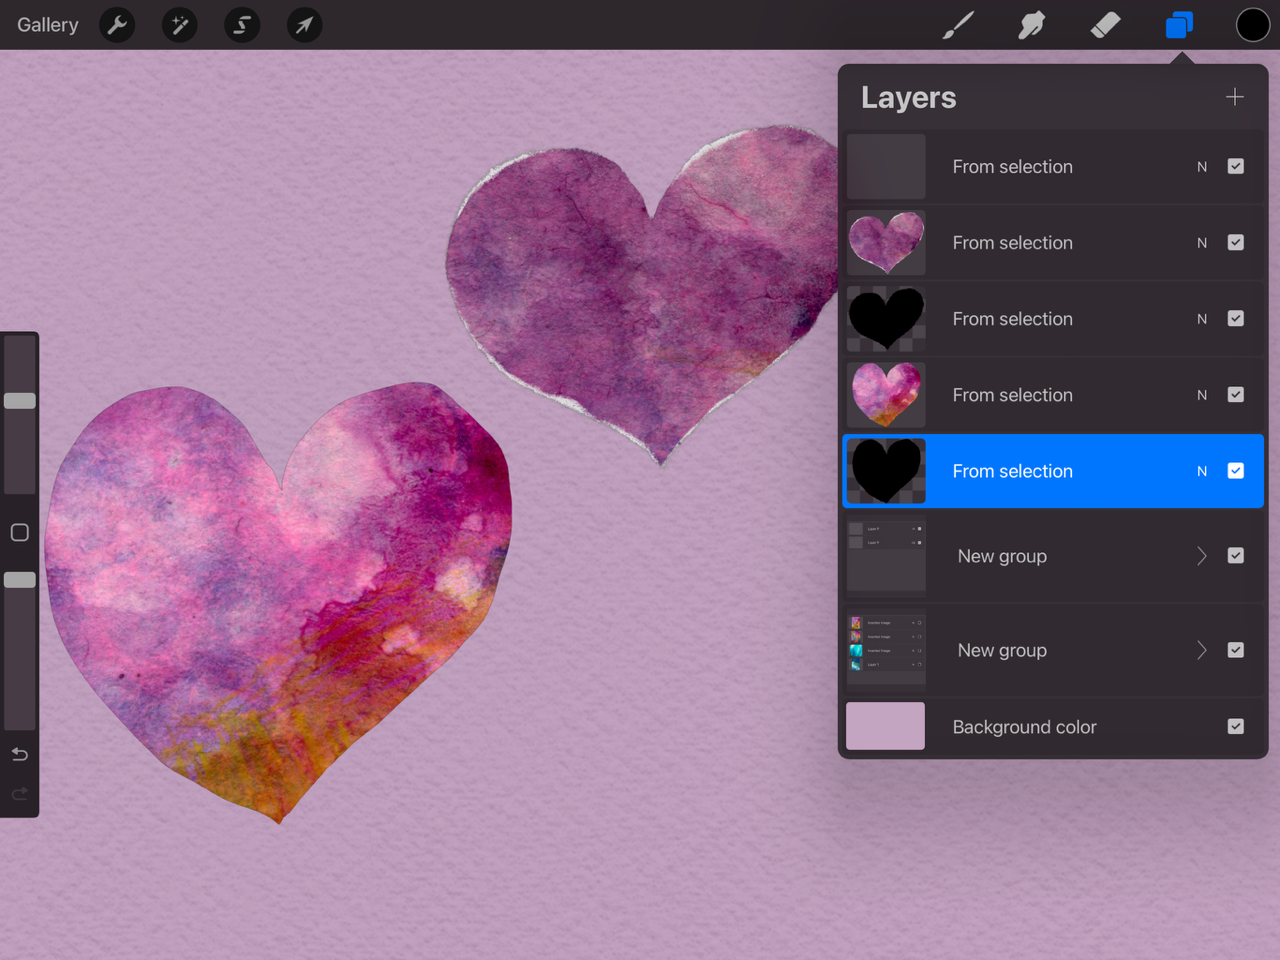
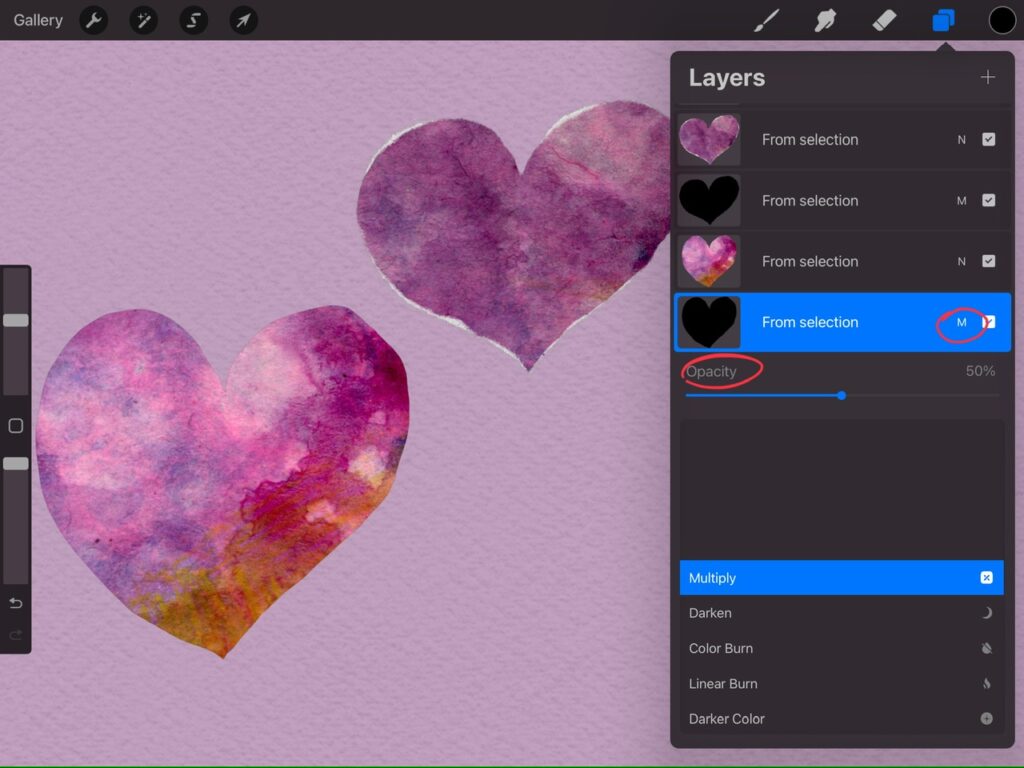
You will likely be creating NUMEROUS cutouts when doing a collage so lets keep this simple. Duplicate a layer that has a cutout. Alpha Lock the bottom one and Fill Layer with black. Then turn the Blend Mode to Multiply and reduce the Opacity to about 25-50% depending on the look you want. Now you need to blur it a bit, which means you also need to turn Alpha Lock OFF again! Now go to the Magic Wand and select Gaussian Blur. I have been blurring about 3% (too much will make it look like it’s floating over the paper below it). You won’t be able to see much and that’s ok. It’s not like lettering, where we shift everything over.
While you have one shadow layer selected, go back into the Adjustments menu (magic wand) and go to Liquify. It’s time to push the shadow around here and there. Exposing some bits, and hiding some other bits even more. It’s easy to go overboard on this step. The areas with more shadow exposed will make the cutout look like it’s not resting flat on the paper in that spot. You can see my Liquify settings below.
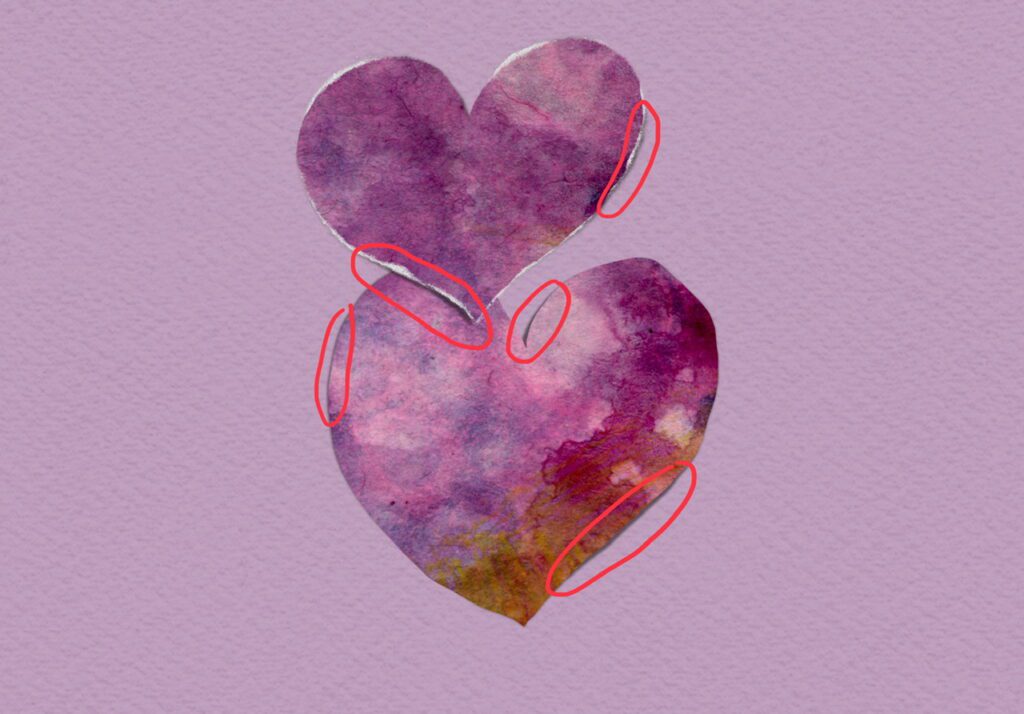
In the first image below, I have highlighted the few small shadows I added and overlapped the hearts so you can see the effect it gives! In the second image, I did some mark-making with my new Mixed Media brushes. One is with the neocolor ii brush, the other is with the big wet acrylic brush. These are newsletter freebies that you don’t want to miss and I show you how to use them on YouTube! You can play with so many brushes for your mark-making! Pro tip: Careful not to choose bright white! These are about 97% brightness.

You’re done! Have fun. Experiment. Play with blend modes. Add textures. The world is your oyster! And if you want to make your own papers really easily without using images from Unsplash, here is a YouTube lesson on it!


2 thoughts on “Paper Meets Pixel: How to Make Collage Art in Procreate”
Thanks for showing your process! It’s much easier than the way I was doing it yesterday.
Thank you Jen + I learned a new quote that I love “The world is your oyster!”
Comments are closed.