I have been making seamless repeat patterns in Procreate for years and I love teaching others how as well!
Disclaimer
There have been some big changes to the process as the app gets updates and upgrades…which is also something we are expecting any day now! In fact, I was going to wait and start this mini-series after the update but 👏🏼they 👏🏼are 👏🏼 taking 👏🏼forever to release the update. So I’m going to go ahead with this mini series and I will post more info if/when there are changes to this process!
In my last post I talked about why I make patterns in Procreate. In this post I am going to show you the very basics for making your own pattern 100% in Procreate! If you have tried other people’s methods and given up or gotten confused, if you want to throw your iPad across the room because you keep getting the dreaded pixel gap on your seam, or if you are so frustrated at the fuzzy pixelation that can happen in Procreate, I would encourage you to stick around! I can help!
I went over a couple general Procreate basics like color profile and dpi here, and the now I will talk specifically about IMPORTANT pattern-making tips in Procreate. This is a nuts & bolts lesson.😉
I will give more info about each of these but to sum it up:
- Your canvas size needs to be even numbers of pixels so we can “cut” it in half evenly.
- Your motifs crop off the edge of the canvas (THIS might change in the update!)
- Too much rotating of your motifs makes them fuzzy but setting Interpolation to Bicubic helps.
- “Corner marks” are necessary to make the moving around of the layers accurate.
- When something is selected, tapping the screen nudges the selection one pixel…causing unwanted gaps.
Canvas Dimensions
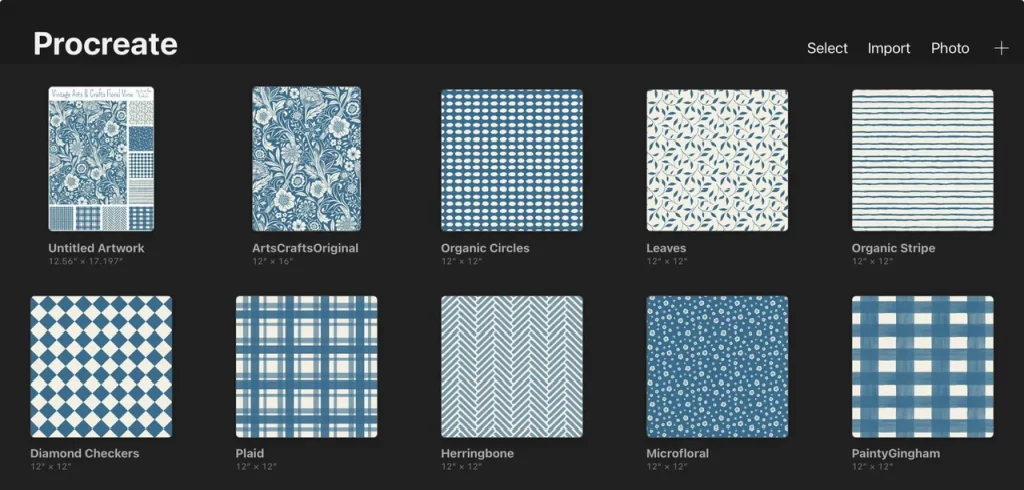
I usually use a 12×12 inch canvas at 300 dpi which is equivalent to 3600 pixels by 3600 pixels. But you can make patterns in Procreate with rectangles too. THE MOST IMPORTANT PART is that the dimensions in pixels are even numbers. For example, I have seen some people use 27 cm by 27 cm as their canvas size but at 300 dpi, this converts to 3189 pixels by 3189 pixels. That does NOT work for patterns since we do a lot of “cutting in half” and those halves need to be equal in size!
Let’s Begin!
Make your canvas and go to the Actions menu, turn on Drawing Guide then go to Edit Drawing Guide.
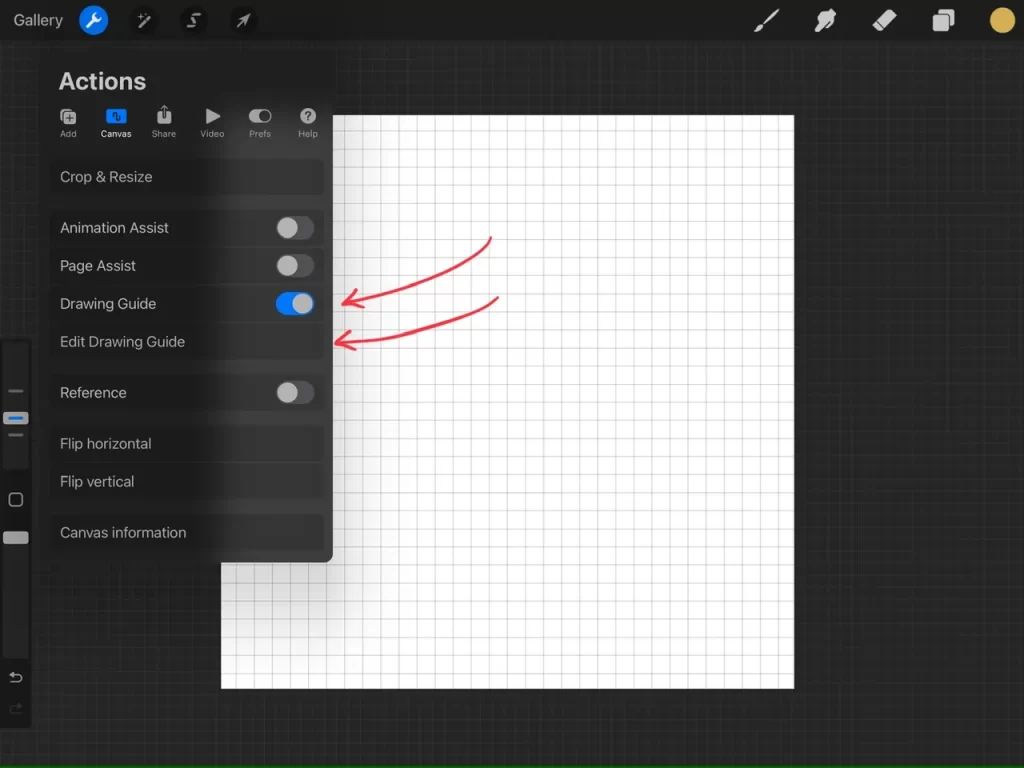
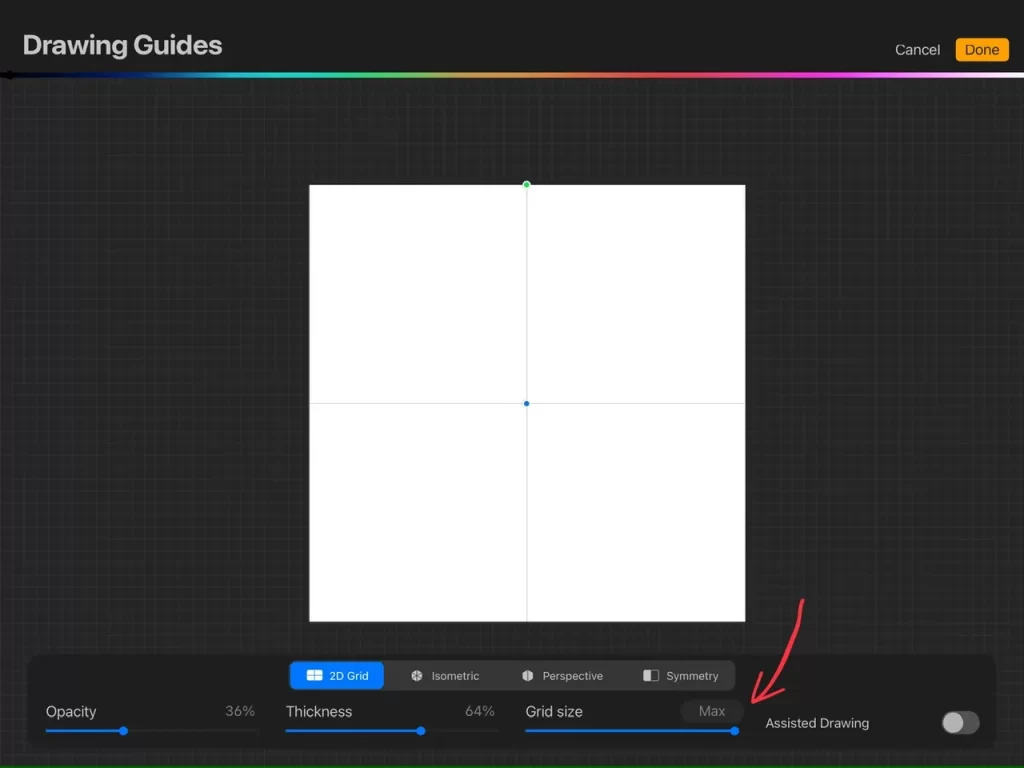
Turn your grid size to the max! Tap Done. These are just your guides to know where the horizontal and vertical centers are. You will essentially be cutting along these lines and rearranging the quarters. Once you do that, these center lines become the outer edges! So place your motifs in these areas first…but try not to create a plus sign shape out of your motifs. 😉
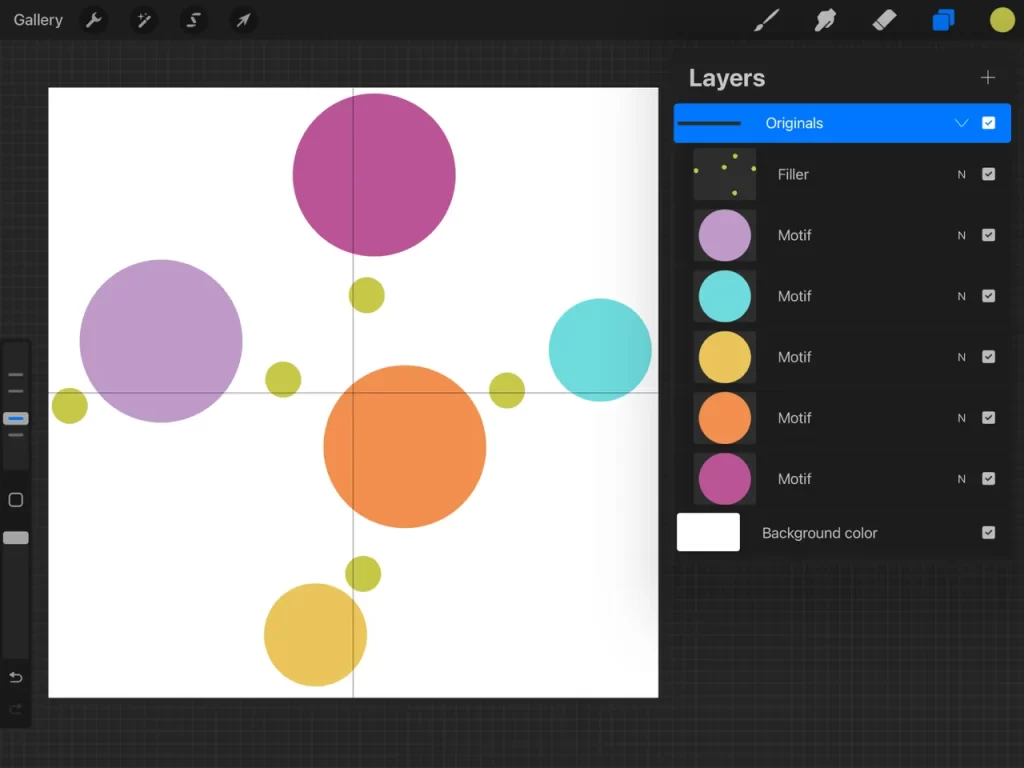
Add Your Motifs
These dots are representing motifs. These can be anything! Flowers, mugs, dogs, you name it! I placed all of the motifs that need to overlap the center lines before we “cut” them. Your motifs can NOT go off the edges of the canvas or they get cropped. In the next Procreate update, this is going to change!
Those outer corners of the canvas will end up merging and becoming the center after we “cut”. Then we can place more motifs to fill the center. I’ve also scattered the dots so they don’t make horizontal or vertical lines. Since this is a repeating tile, that teal dot will end up next to the light purple dot, and the fuchsia dot will end up next to the yellow dot.
Preventing Pixelation
To prevent pixelation while making patterns in Procreate, when moving motifs around to get them into the perfect spot, try not to rotate or resize them more than one time and have Interpolation set to Bicubic (there’s a pic of that in a bit). I also made a Group out of all these layers (with simple dots, you don’t need these on separate layers but if you had complicated motifs, you would want them on separate layers like this).
Time to group and duplicate.
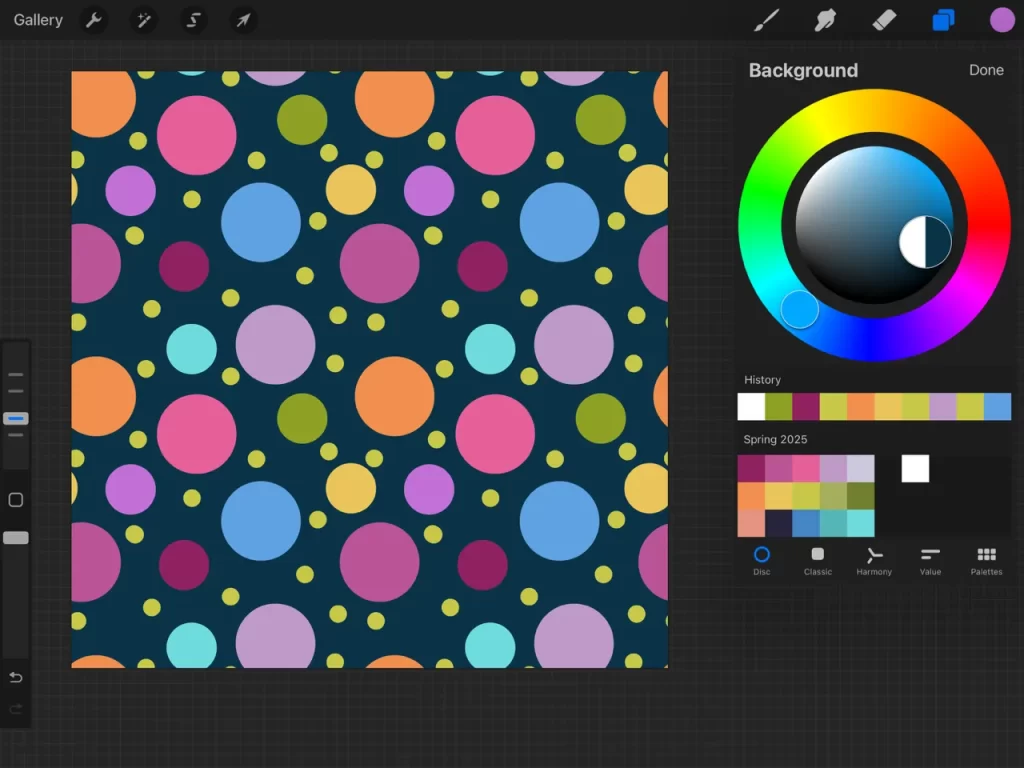
When I make patterns in Procreate I make them independent of the background so you can change the background color later! This gives me lots of options for colorways. Go ahead and turn off the Background Color. Three-finger swipe down to get to this Copy & Paste menu and tap Copy All. Go to a layer above the group or just tap the group name then three-finger swipe down again and tap Paste.
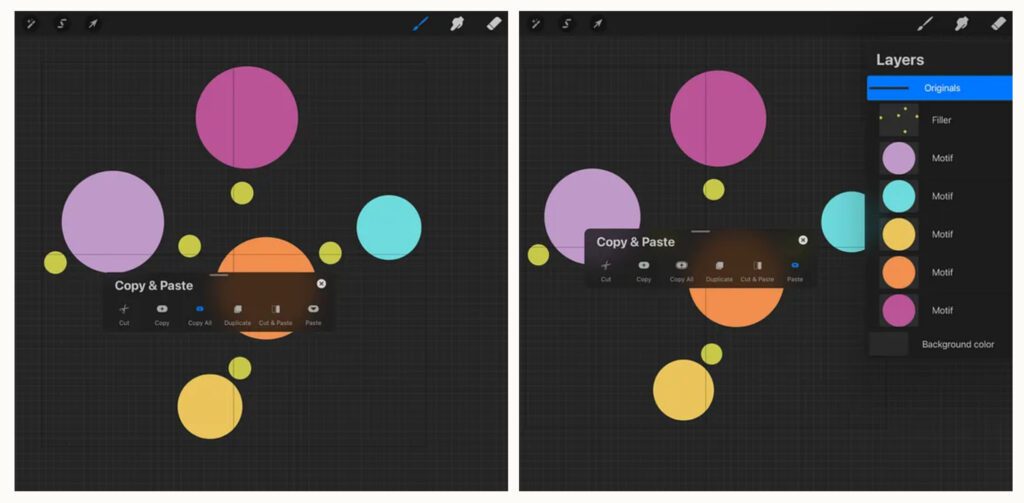
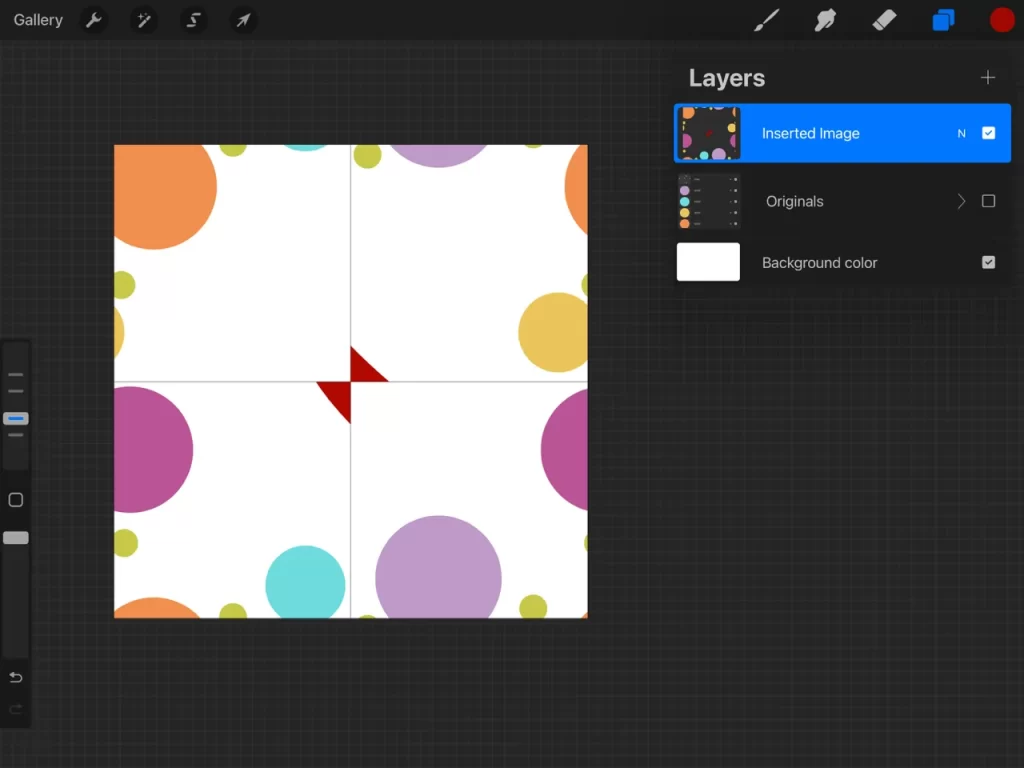
Now you have one layer with all of your motifs on it! You can turn on the background layer again. Turn the group of original motifs off. If this stays on, it causes issues later.

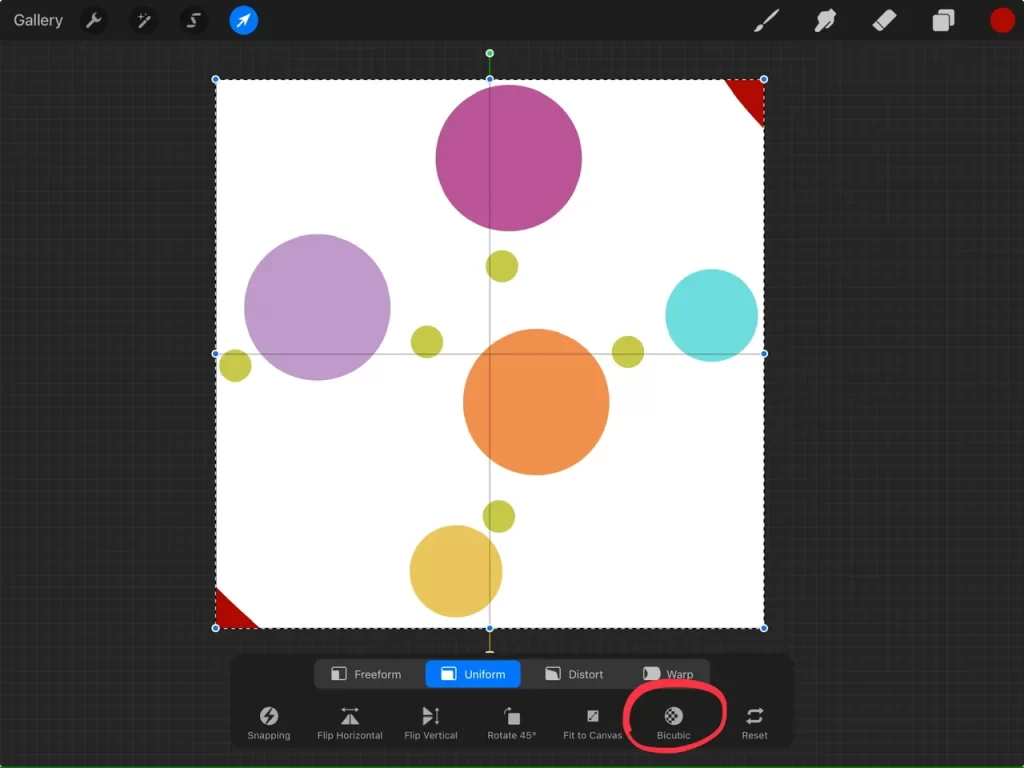
Add 2 “corner marks” in a contrasting color (seen below in red) so they don’t hide from you later. Go right off the edges of the canvas with these marks, two marks in opposing corners. These marks put pixels of color to all for edges of your canvas which makes the Selection the same size as the canvas. You can see the dotted line going around the whole canvas below. If you didn’t have the corner marks, the dotted line would go to the outermost parts of the dots. It’s important to have the selection be the size of the canvas because we are moving it very precisely in the next step, the “cutting”. You can also see my Interpolation is set to Bicubic, this helps the program figure out where the pixels need to go every time you move them.
Great! Now you need to duplicate that layer until you have four! I didn’t do it in these screenshots but can also turn off the drawing guide lines if you want!
Time to CUT!
The easiest way to do this is to turn off all layers except the one you are moving.
Tap that layer to select it and turn on Snapping. I keep my Snapping settings like you see here (you do not need Magnetics).

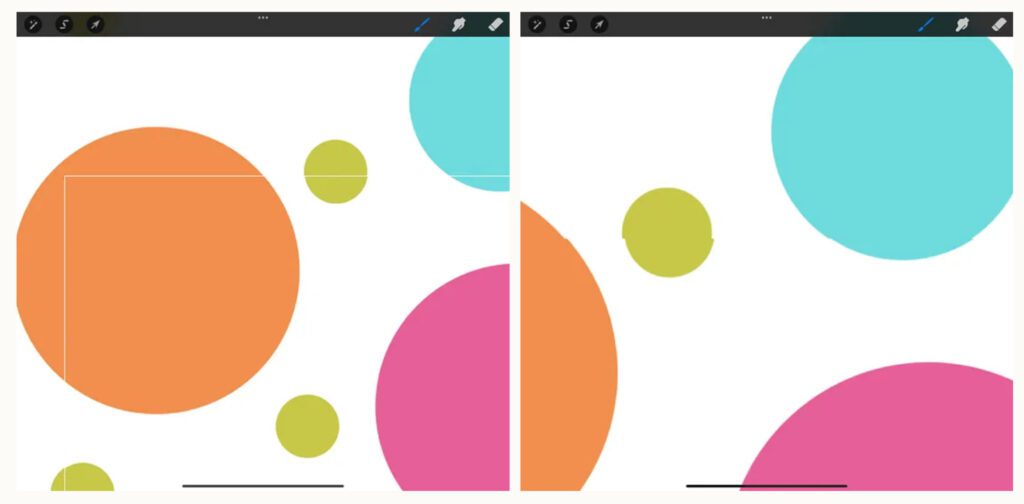
Are you still with me? Grab your selection by tapping in the middle (not near any nodes) and slide it up to a corner so it snaps with the corner perfectly in the center. You will see the lines turn gold in both directions, that’s how you know it’s centered. This will snap very easily if you have manually turned off all the other layers by unchecking the boxes. If you happen to know the trick to magically turn off all layers at once….that won’t work with the snapping….the app will think they are still on. It’s best to avoid using this trick when making patterns in Procreate.
Let go of your selection and tap the arrow to deselect it. If you touch the screen somewhere while there is an active selection, it will nudge the selection in the direction of the place you tapped, and this causes the dreaded pixel gap later! You might not even know about it until the end!
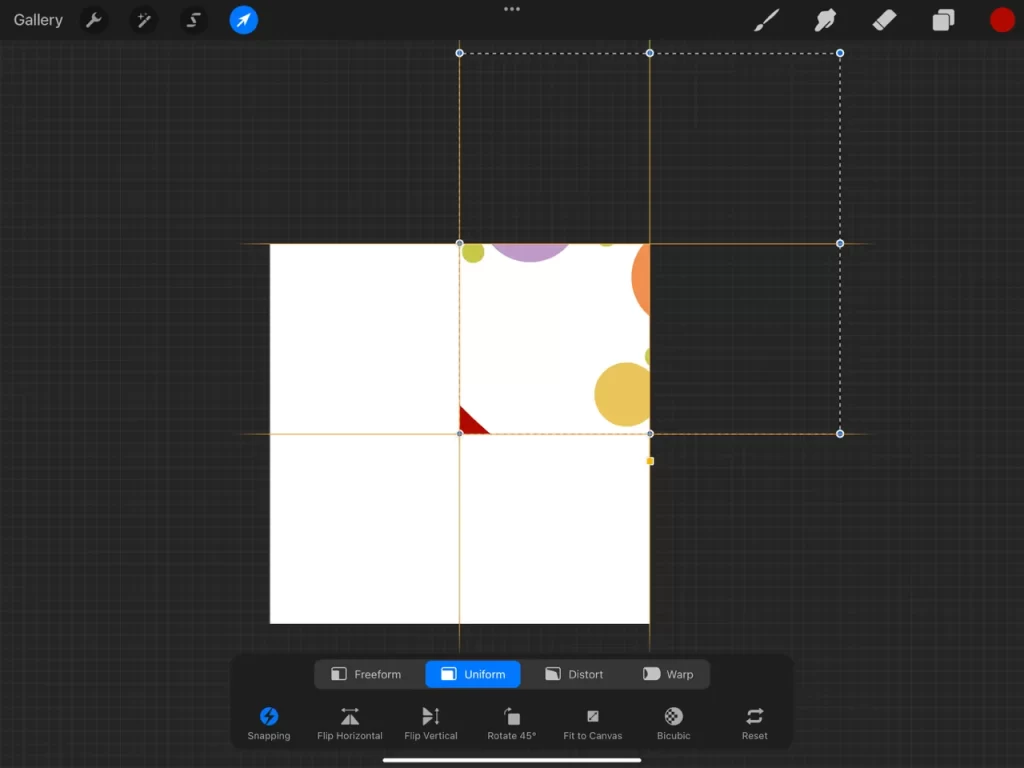
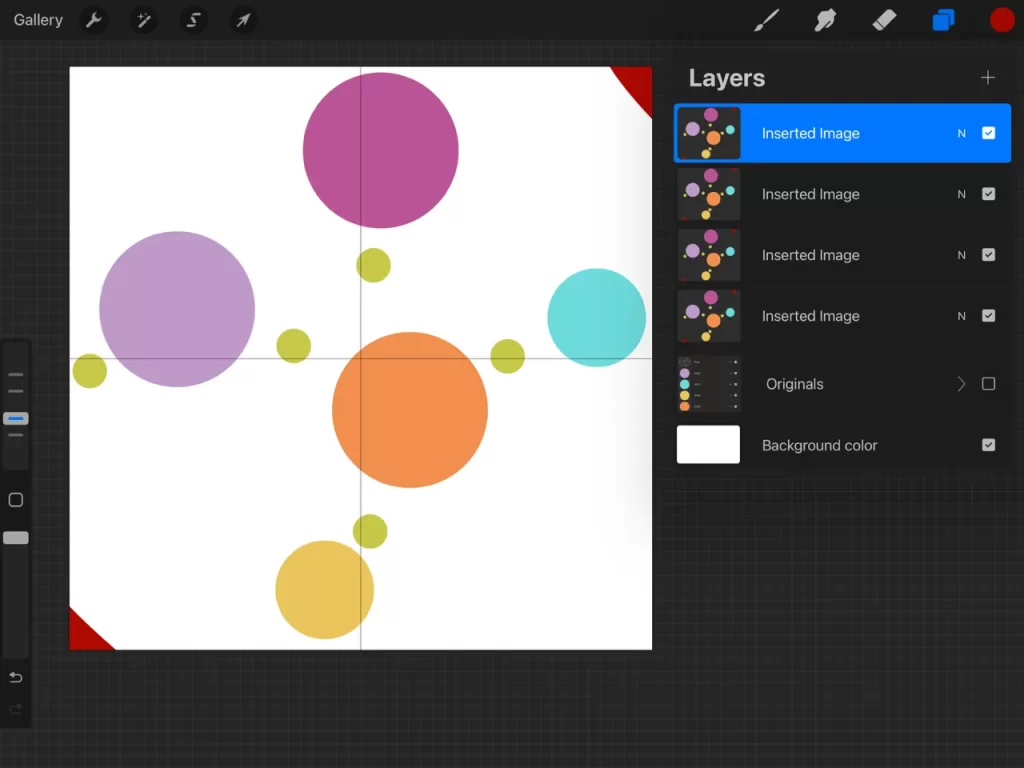
Turn on one layer at a time and move each one to the four corners! This is how you “cut” your motifs! Can you see that the motifs that were along the center lines are now around the edges? Those motifs should perfectly line up with each other when you tile them! But we need to finish! Merge the four layers together (I pinch them) and erase the corner marks that are now in the center.
Time to add more motifs!
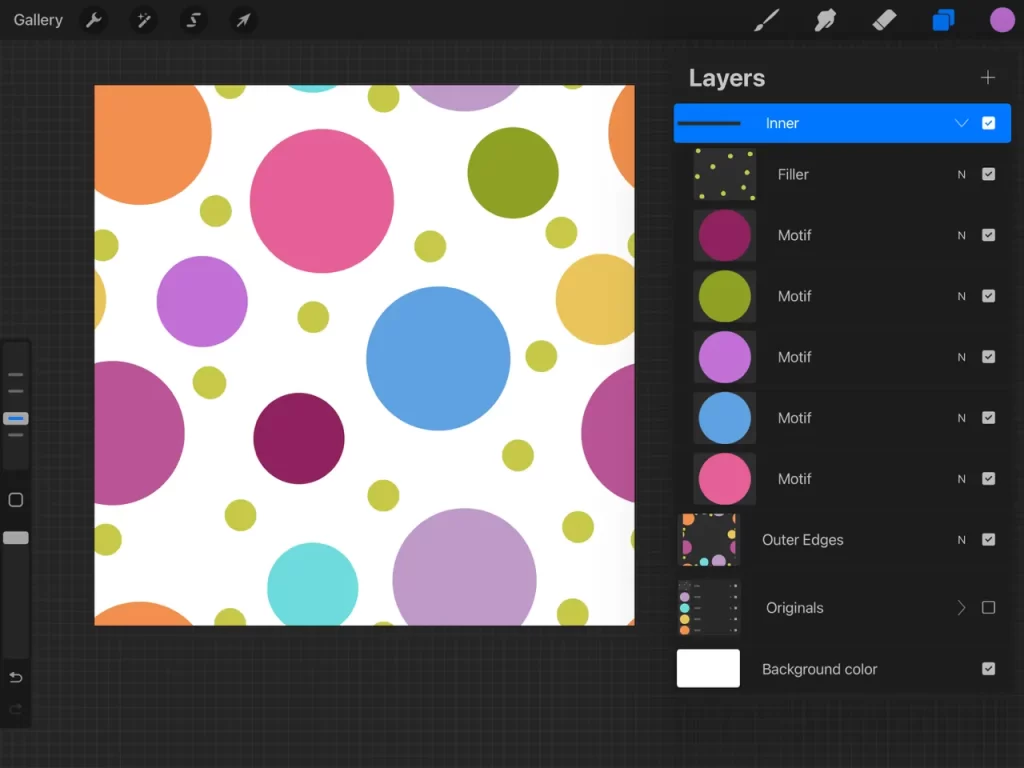
I usually turn snapping off as I am positioning more motifs and then turn it back on before the next step. Below, you can see I made another group of the layers that contain more motifs. These are the dots that fill in the inner areas. Just like before, you are going to turn off the background, three-finger swipe down to Copy All and again to Paste. Then you will have all of your design on one layer and THAT IS YOUR COMPLETE PATTERN! But you need to check it!
I know this post is long but this part is crucial! It’s time to check your seams!
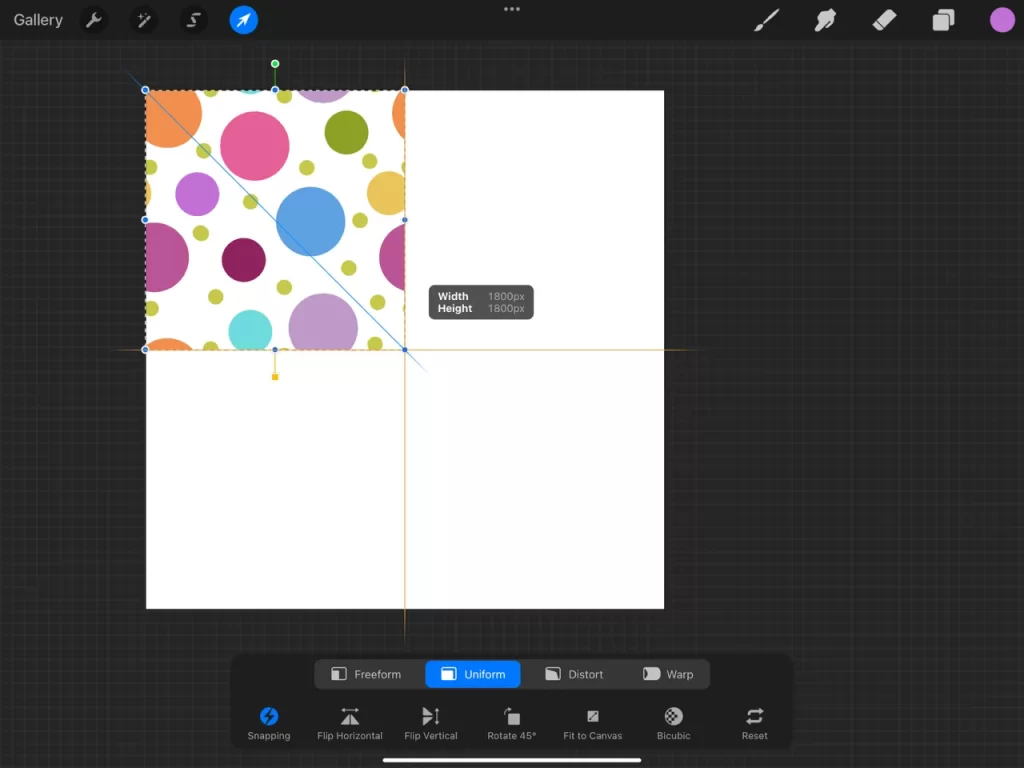
Duplicate your layers until you have 4 (I usually make a 5th one and turn it off, setting it aside as my complete pattern). Choose a layer. This time you are grabbing the node on a corner and sliding it to the center to shrink the layer. It will snap just like before. Shrink one to each corner but don’t merge them yet! TIP: you usually do not need corner marks at this stage. Usually you already have pixels of color going to all for sides of the canvas by the time you get to this step.
Check for errors and likability.
Until you get used to it, it’s somewhat easy to accidentally get pixel gaps when making patterns in Procreate. You need to check for a few things now to make sure you have a pattern you like and that it’s seamless. When viewing the zoomed out version of a pattern you can more easily see issues with how you have placed certain motifs. You may have to backtrack quite a ways to fix these things but I promise it gets easier with practice.
Now zoom way in to the middle and toggle one of the layers on and off. This helps you see exactly where the seams are. You need to check along the center lines (the seams) to make sure you don’t have pixel gaps or offsets like you can see below. If you do, you need to backtrack and troubleshoot why that might be.
If everything looks good, merge your layers! You now have a 2×2 of your pattern and it can be used as well as the 1×1 version! Congrats! And since you made your pattern with the motifs separate from the background, you can make many versions of it by changing the background color!
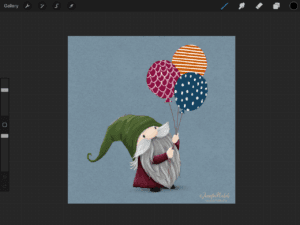
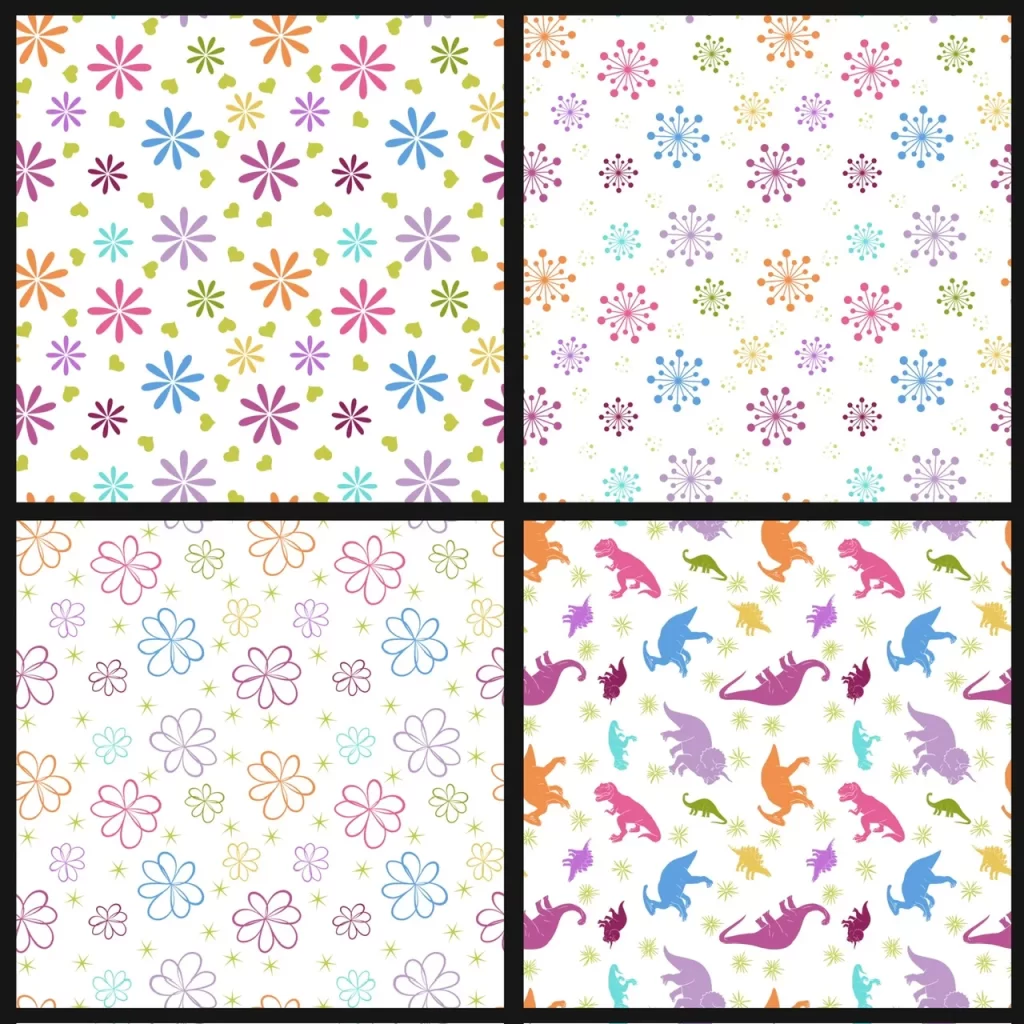
You did it! Is this your first pattern in Procreate? How did it go? I know this is a long post but I wanted to include all the screenshots for you. These dots can be so many things! Here are a couple other simple examples I made with some of my stamp brushes! I kept the colors and “dots” in the same locations as the polka dots above! If you learn better with videos, I have loads of lessons on simple to complex patterns in my membership!
Let me know if this was helpful for you! Enjoy!
-Jennifer Nichols